Guides
How to Use the Pattern Editor
The pattern editor is where you refine, edit, and create your cross-stitch patterns. It's the same editor across all of Xstitchify's tools - whether you generated a pattern from a photo, drew something in the Designer, or got an AI-generated result, you'll use these same tools to tweak it.
The toolbar
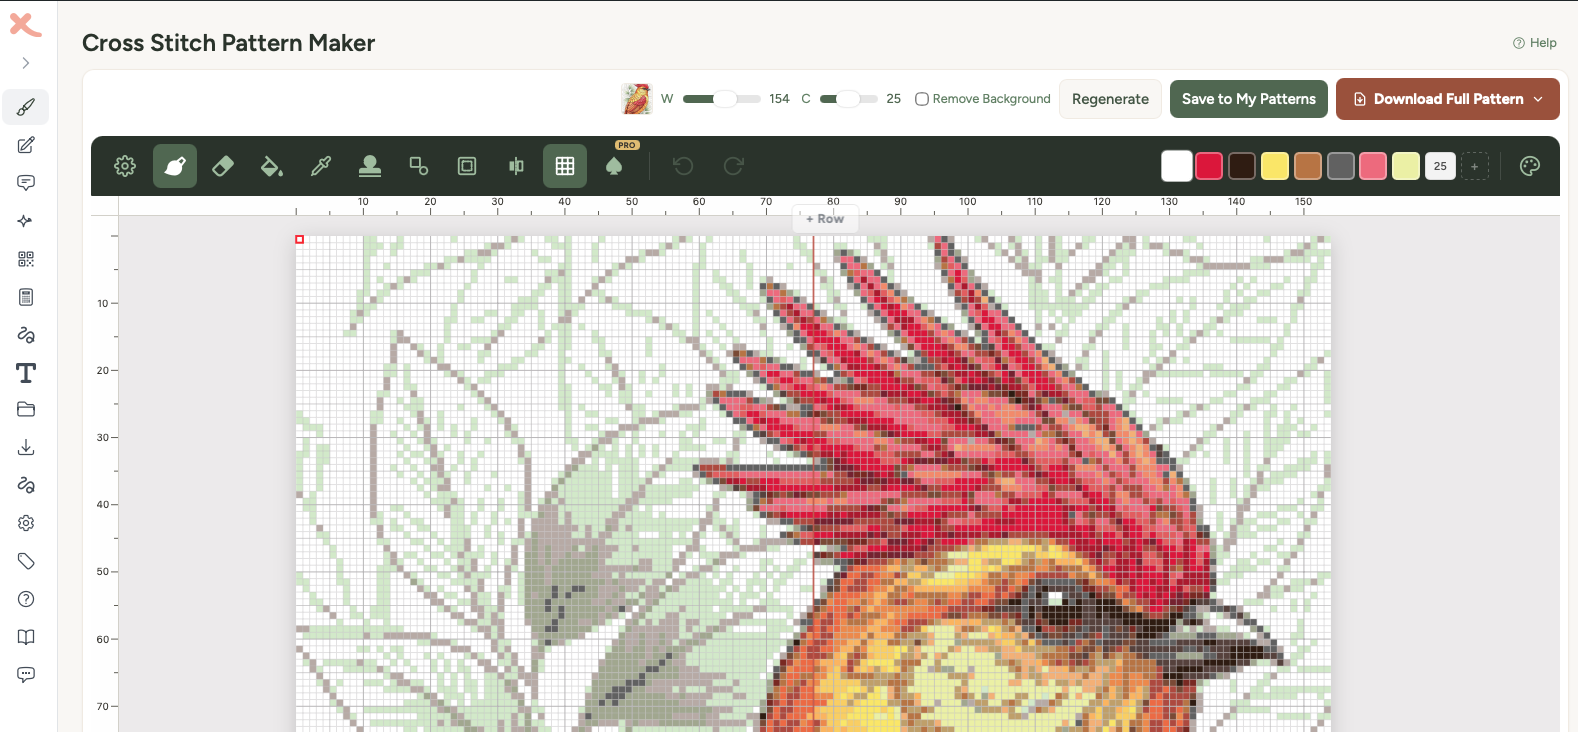
The toolbar sits at the top of the editor. It contains all your drawing tools, colour swatches, and settings.
On desktop, all tools are shown as individual buttons in the toolbar bar. You'll see the settings gear, each drawing tool, undo/redo, and your colour swatches all laid out across the top. Click a tool to select it, and some tools show a dropdown panel with extra options (like brush size or stamp selection).
On mobile, the toolbar is condensed to fit the smaller screen. Tools are accessed through a compact dropdown rather than all being visible at once. Buttons are slightly smaller and more tightly spaced. The colour swatches show 6 colours (vs 8 on desktop) with an overflow button to see the rest.
Drawing tools
Brush
The main drawing tool. Click or drag to place stitches in your selected colour. You can adjust the brush size from 1 to 5 cells wide - great for filling in larger areas quickly.
If you're using a stylus (Apple Pencil, Samsung S Pen, or Wacom), the brush supports pressure sensitivity. In pressure mode, pressing harder gives you a wider stroke and pressing lightly gives you a thinner one. You can set the minimum size (1-5) and maximum size (1-8) separately.
Eraser
Works just like the brush but removes stitches instead of placing them. Same size controls (1-5 cells).
Fill (bucket)
Click on any area to flood-fill it with your selected colour. It fills all connected cells of the same colour. No size settings needed - just click.
Eyedropper
Click on any stitch on the canvas to pick up its colour. The colour becomes your active colour so you can draw with it. You can also hold Alt (or Option on Mac) from any other tool to temporarily switch to the eyedropper - release the key to go back to your previous tool.
Shapes
Draw geometric shapes by clicking and dragging on the canvas:
- Rectangle - filled or outline
- Circle - filled or outline
- Diamond - filled or outline
- Triangle - filled or outline
- Line - straight line from point to point
A toggle lets you switch between filled shapes and outlines. You'll see a preview of the shape as you drag before releasing to place it.
Stamps
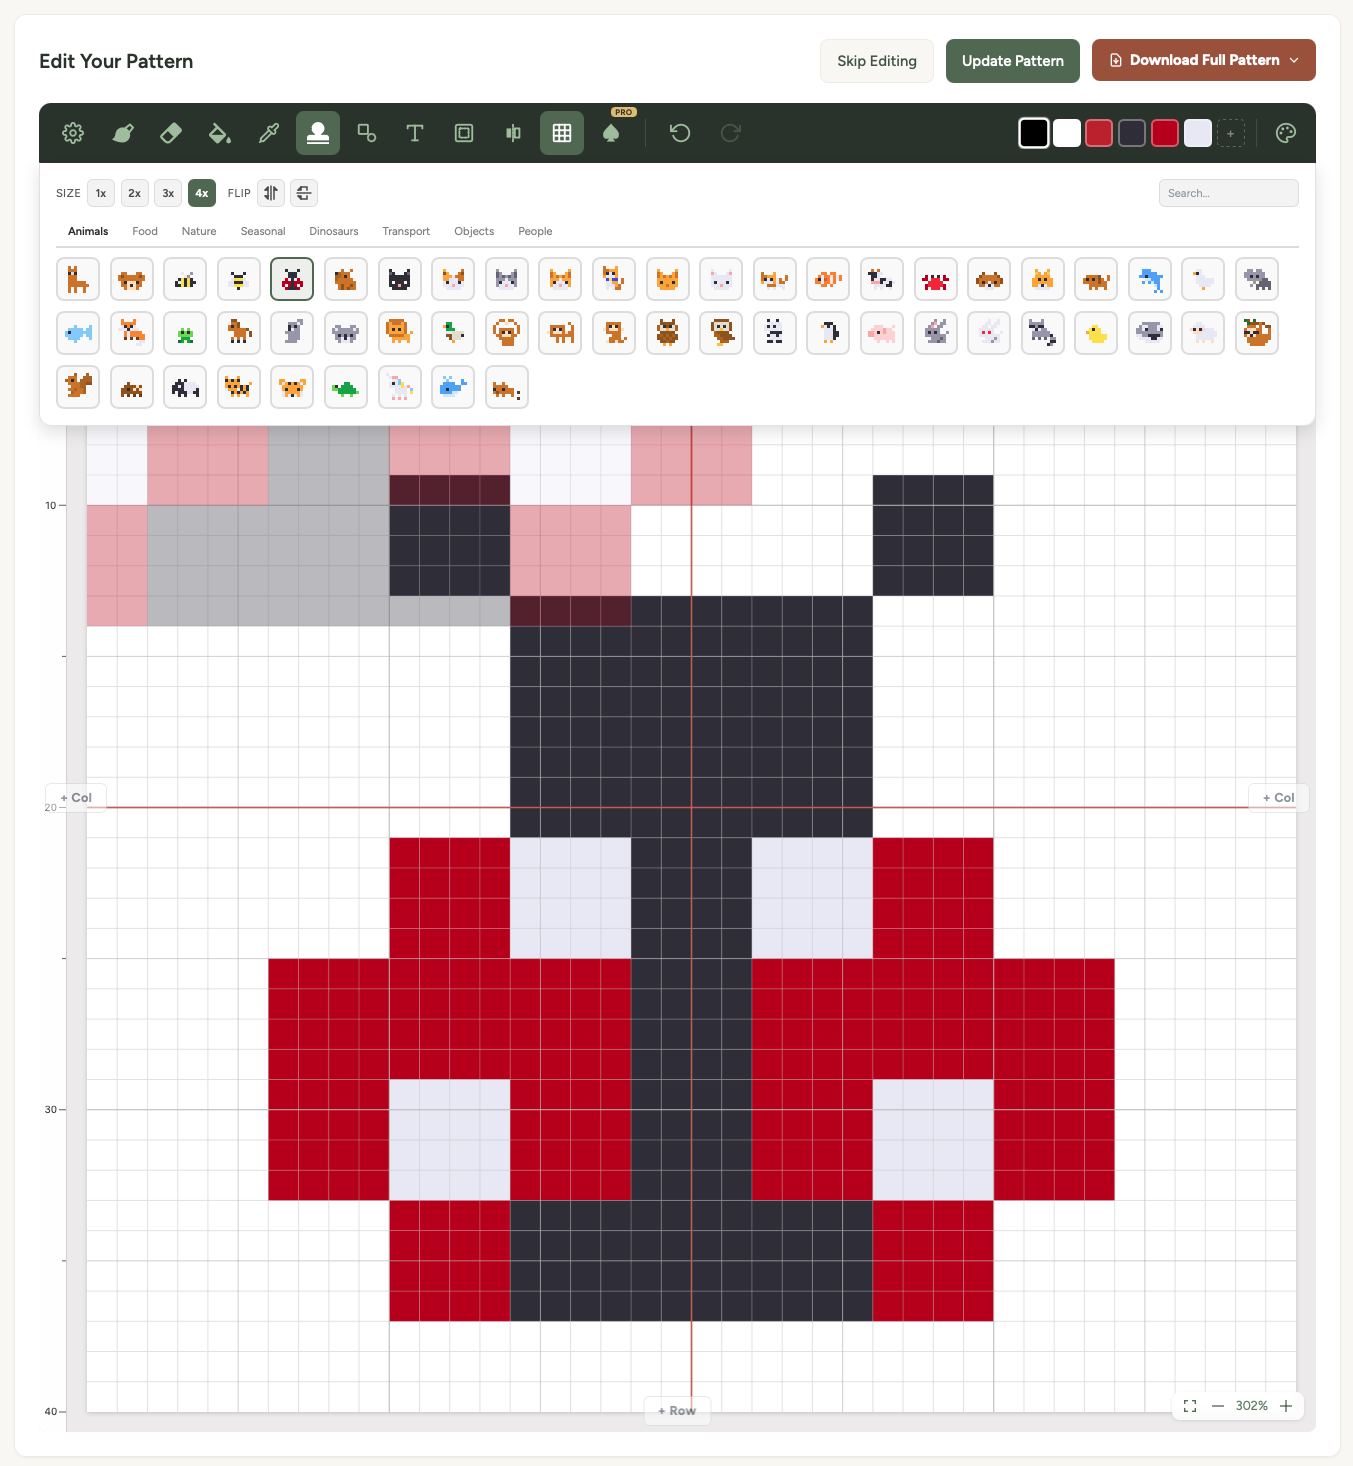
The stamp tool lets you place pre-made pixel art designs onto your canvas. There are over 200 icons across eight categories: animals, food, nature, seasonal, dinosaurs, transport, objects, and people.
Stamps have a few controls:
- Scale - make the stamp bigger or smaller
- Flip horizontal - mirror the stamp left to right
- Flip vertical - mirror the stamp top to bottom
Multi-colour stamps keep their original colours (adding any new colours to your palette automatically). You'll see a semi-transparent preview of the stamp as you hover, so you can position it exactly where you want before clicking to place it.
Colour picker
Click on a colour swatch in the toolbar to open the colour picker. It has two tabs:
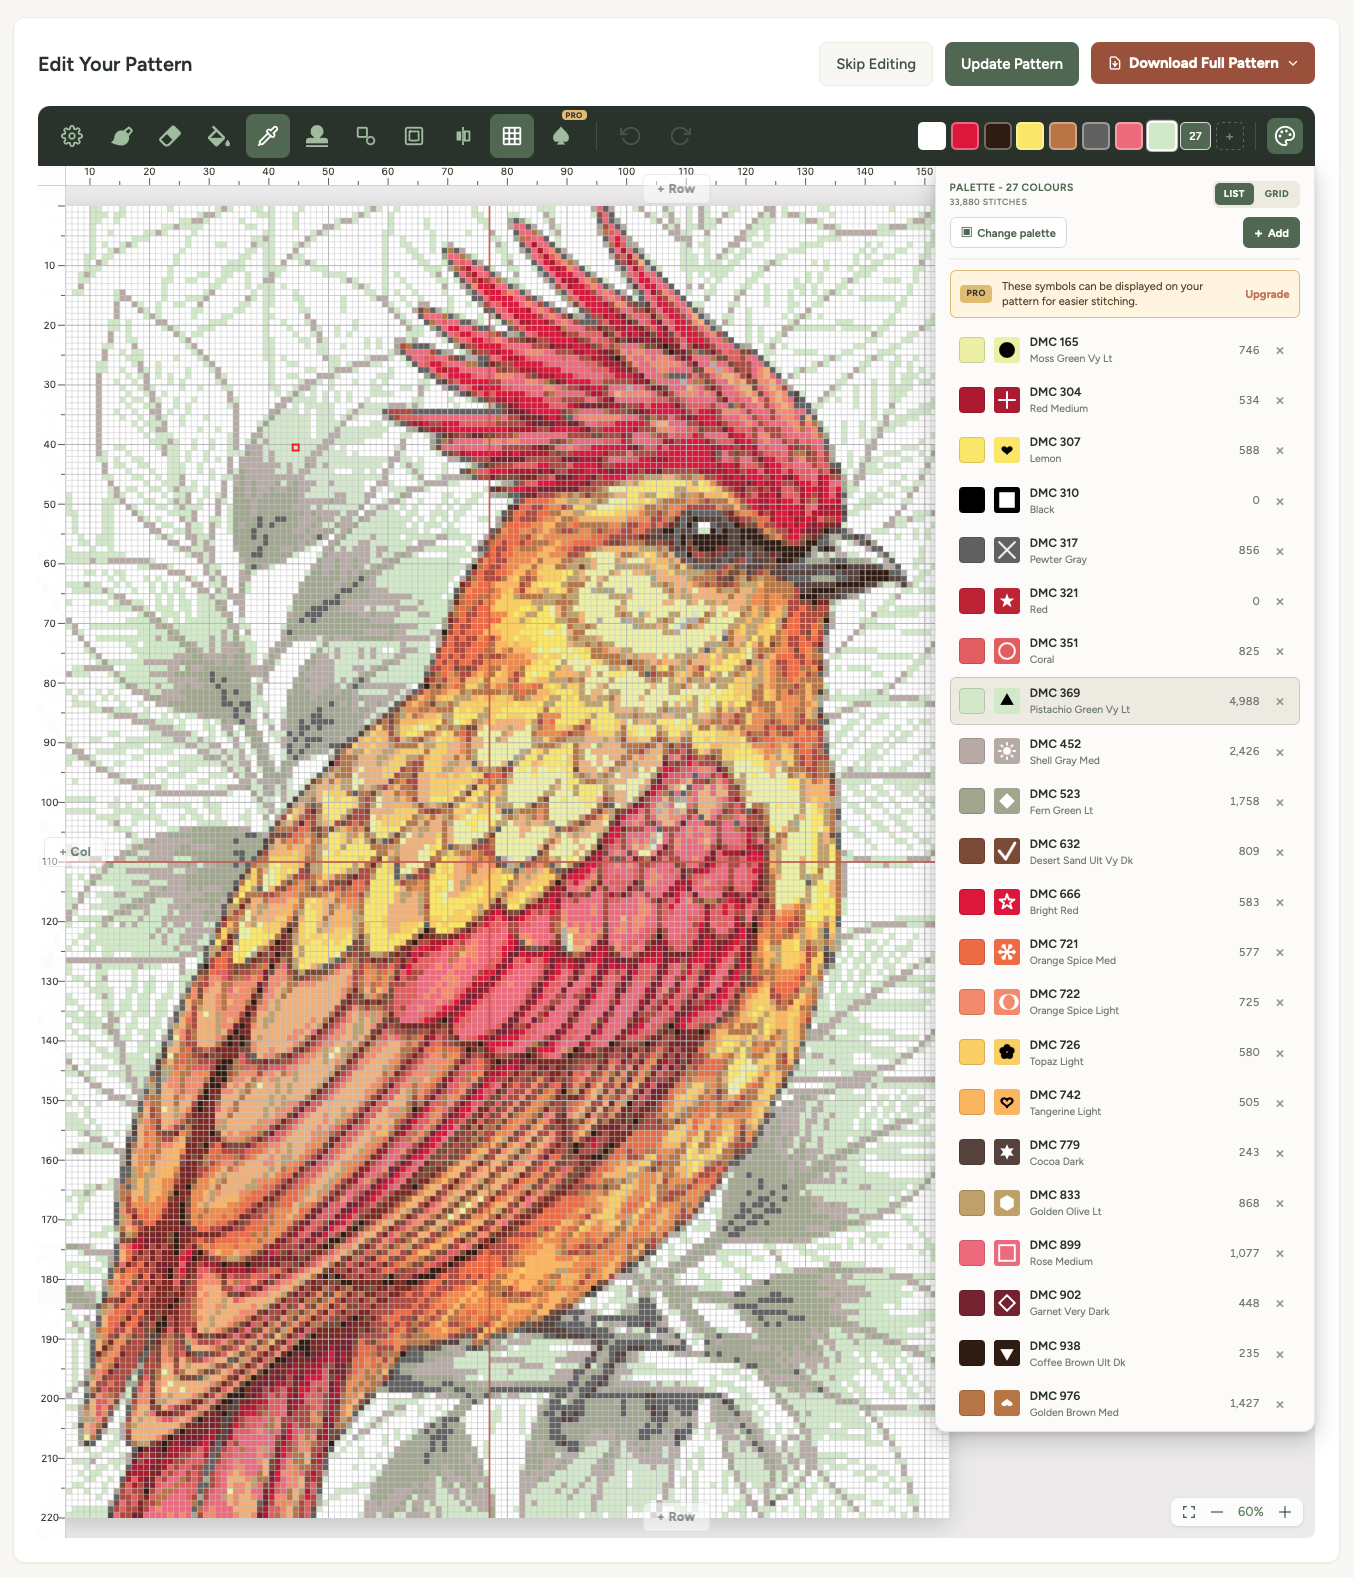
Thread colours
Browse colours from real thread brands - DMC, Anchor, Cosmo, and Madeira. You can switch brands using the dropdown at the top of the picker. Search by thread code or colour name to find exactly what you need.
Custom colour
Pick any colour you like using the hue bar and shade picker. Enter a hex code directly if you know the exact colour you want. The picker shows you the nearest matching thread colour for reference, so even with a custom colour you'll know which thread to buy.
Your active colours appear in the palette bar in the toolbar. Click any swatch to switch to that colour, or click the "+" button to add a new colour to your palette.
Symmetry
Symmetry mirrors everything you draw across one or two axes. It works with all drawing tools - brush, eraser, stamps, shapes.
- Horizontal - mirrors left to right across the vertical centre line
- Vertical - mirrors top to bottom across the horizontal centre line
- Both (quadrant) - mirrors in all four quadrants - draw in one corner and the other three fill in automatically
When symmetry is active, you'll see dashed guide lines on the canvas showing the mirror axes. The symmetry icon in the toolbar highlights when a mode is active.
Settings panel
The settings panel (gear icon) is organised into three tabs:
Canvas tab
- Cell size - how large each stitch appears on screen (visual only, doesn't affect the pattern)
- Canvas dimensions - change the width and height of your canvas
- Thread brand - switch the default brand for the colour picker
- Reference image - upload a background image to trace or use as reference, with an opacity slider
- Clear canvas - remove all stitches (creates an undo checkpoint first)
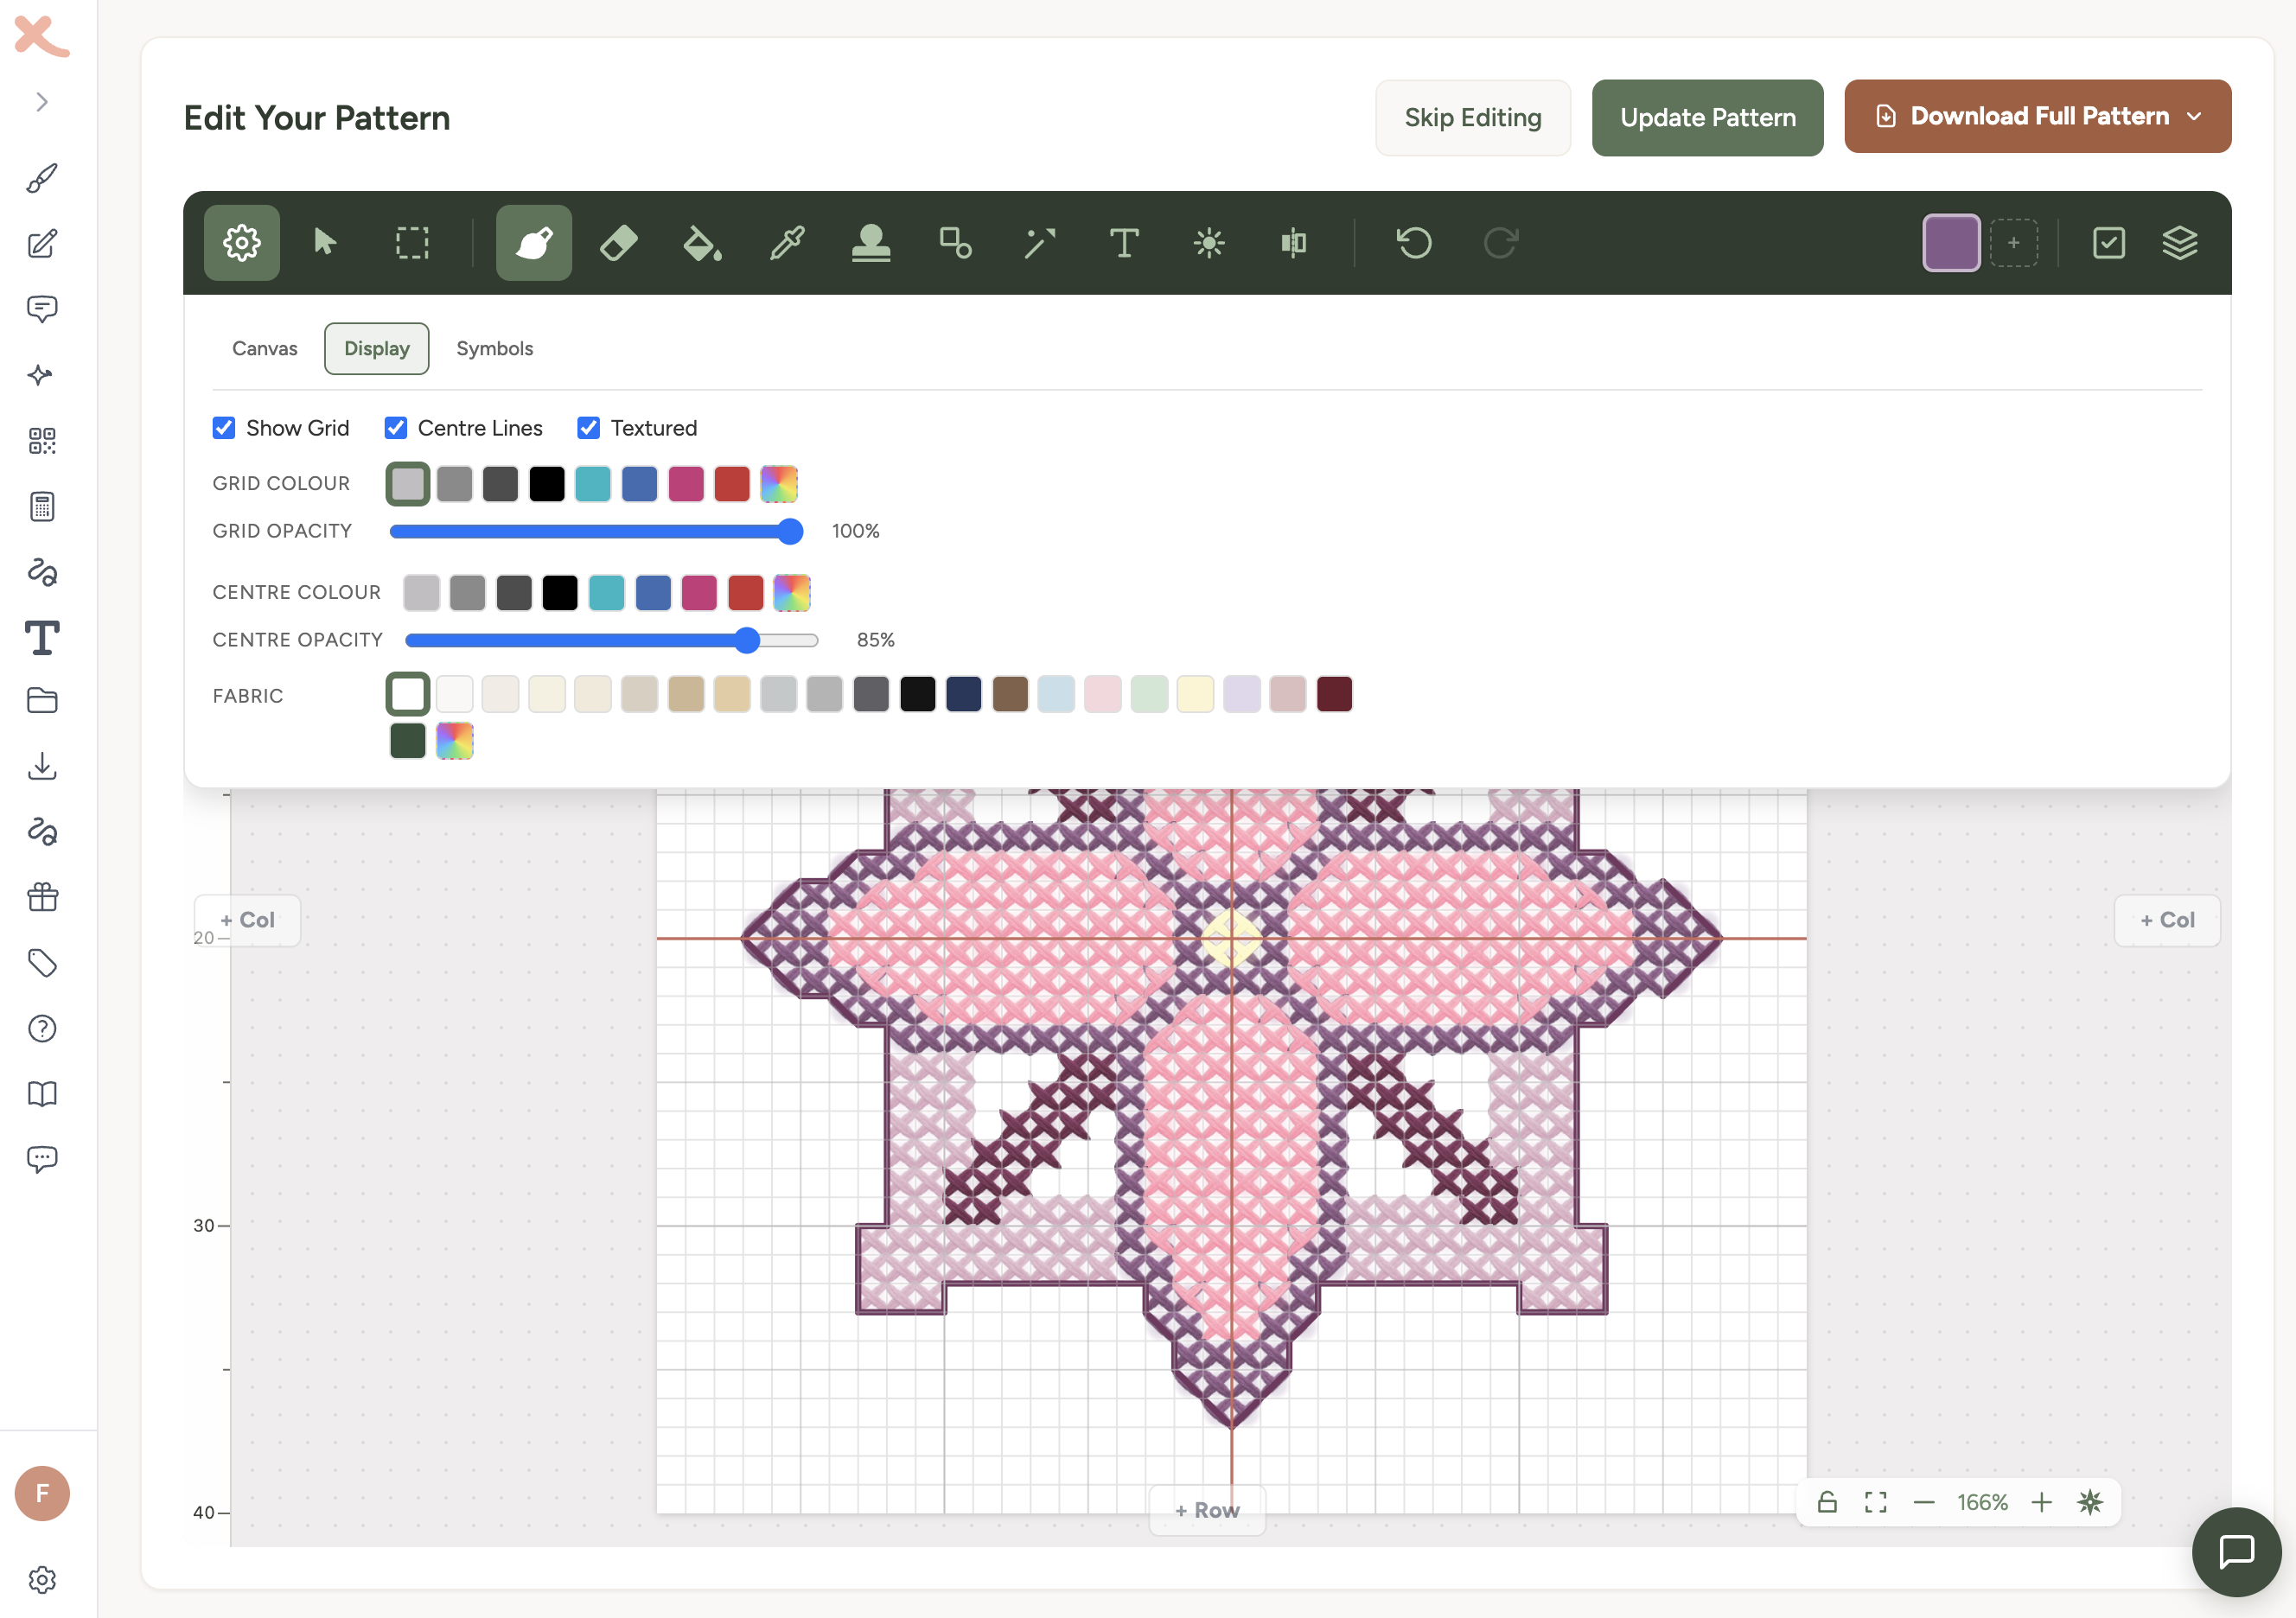
Display tab
- Grid - shows lines between cells, with thicker lines every 5 and 10 stitches (matching standard cross-stitch chart conventions). Also shows numbered rulers along the edges.
- Centre lines - red lines marking the horizontal and vertical centre of the canvas. Helpful for centering your design or aligning symmetry.
- Textured - renders stitches with realistic thread textures instead of flat colour fills (see below)
- Canvas background colour - change the colour of empty (unstitched) cells
Symbols tab
- Off - just colours, no symbols
- Overlay - symbols shown on top of the coloured cells
- Symbol only - white cells with black symbols, like a printed chart. Useful for checking readability before downloading the PDF.
Textured view
The textured view (Settings > Display tab) replaces flat colour fills with layered thread images that look more like real cross stitch. Each full stitch renders as two crossing diagonal threads, and half stitches, 3/4 stitches, and quarter stitches all display correctly with the right thread coverage.
The thread textures load automatically when you enable the setting. At very small zoom levels (below about 6 pixels per cell), the editor falls back to flat colours for performance.
Navigating the canvas
- Scroll - mouse wheel to pan up/down
- Zoom - hold Ctrl (or Cmd on Mac) + mouse wheel to zoom in and out toward the cursor
- Pan - hold Space and drag to pan from any tool
- Trackpad pinch - pinch to zoom on a trackpad (Safari)
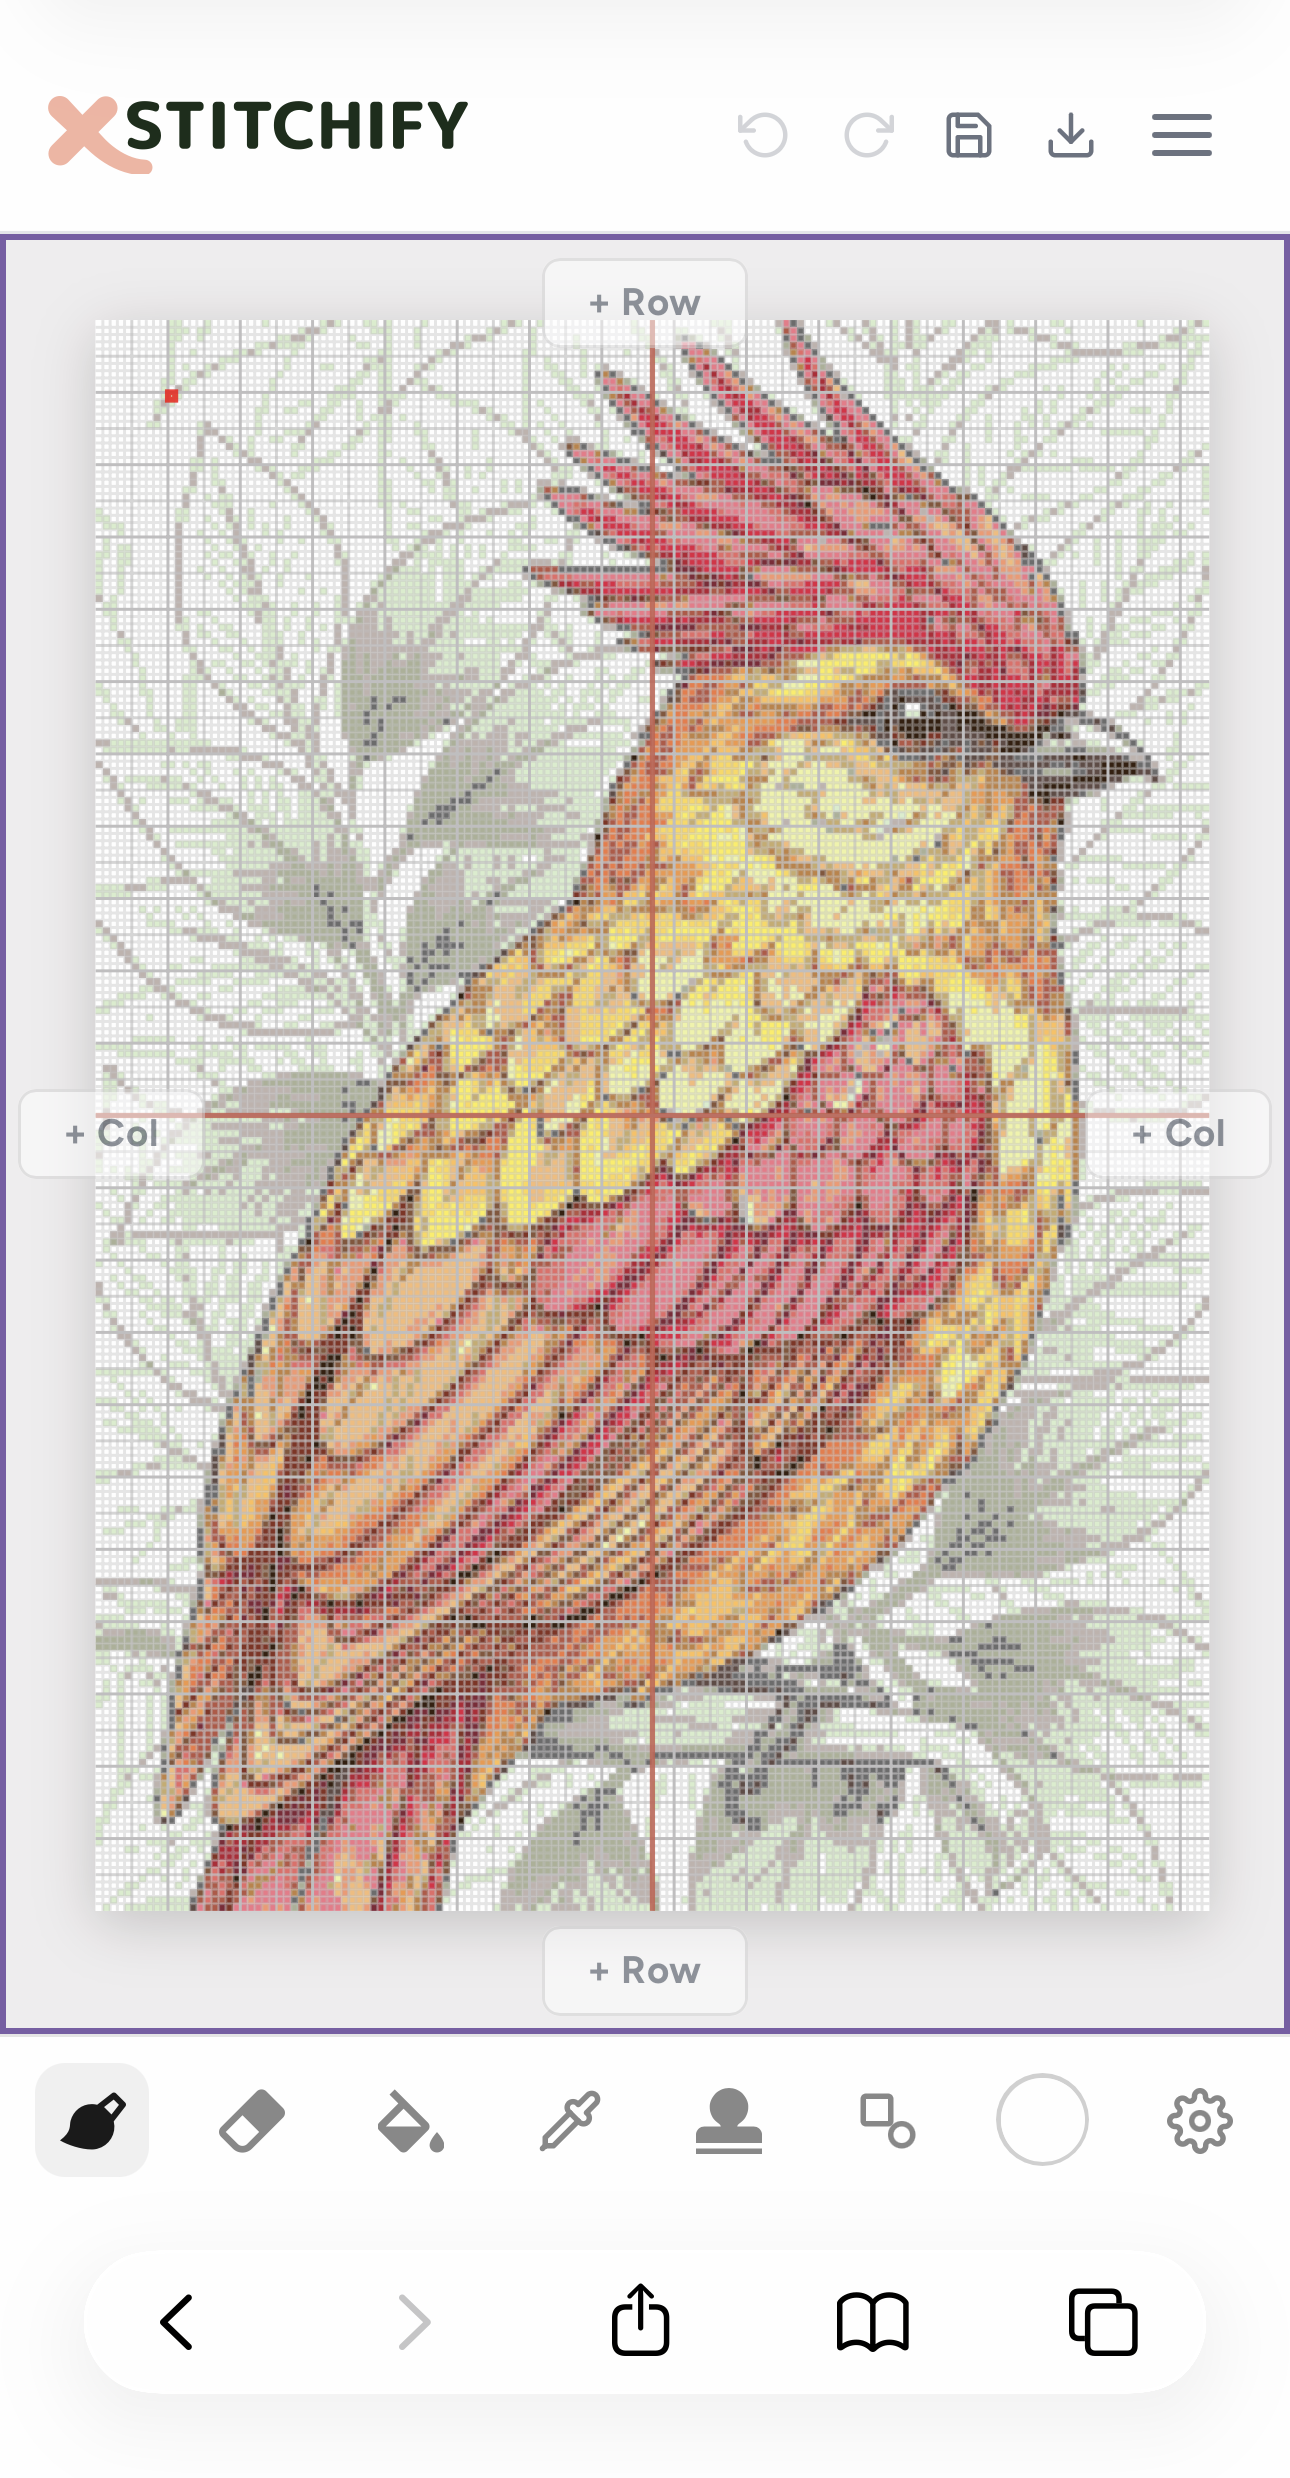
On touch devices, you'll see a touch mode toggle button in the toolbar. This switches between two modes:
- Pan mode - single finger pans the canvas, two fingers pinch to zoom. Use this to navigate around larger patterns.
- Draw mode - single finger draws on the canvas (a purple border appears to show you're in draw mode). Two fingers still pinch to zoom.
Switch between modes depending on whether you need to navigate or draw. If you're using a stylus (Apple Pencil, S Pen), the stylus always draws regardless of the touch mode - your finger pans and the stylus draws.
Undo and redo
- Buttons - the undo and redo buttons are in the toolbar
- Keyboard - Ctrl+Z (or Cmd+Z) to undo, Ctrl+Shift+Z (or Cmd+Y) to redo
- Touch gestures - two-finger tap to undo, three-finger tap to redo (Procreate-style)
Saving and downloading
Your work auto-saves as you go, so you won't lose progress. When you're ready:
- Save to Library - saves the pattern to your account. If you opened this pattern from the library, it updates the existing copy.
- Download PDF - a print-ready chart with symbols, grid lines, and a full thread key.
- Download PNG - a pixel-perfect colour image of your pattern.
Keyboard shortcuts
| Shortcut | Action |
|---|---|
| Ctrl/Cmd + Z | Undo |
| Ctrl/Cmd + Shift + Z or Ctrl/Cmd + Y | Redo |
| Space + drag | Pan the canvas |
| Alt / Option | Temporary eyedropper (hold to sample, release to return) |
| Ctrl/Cmd + scroll | Zoom in/out |
| Escape | Close dropdown panels |
Touch gesture summary
| Gesture | Action |
|---|---|
| Two-finger tap | Undo |
| Three-finger tap | Redo |
| Two-finger pinch | Zoom in/out |
| Single finger (pan mode) | Pan the canvas |
| Single finger (draw mode) | Draw on the canvas |
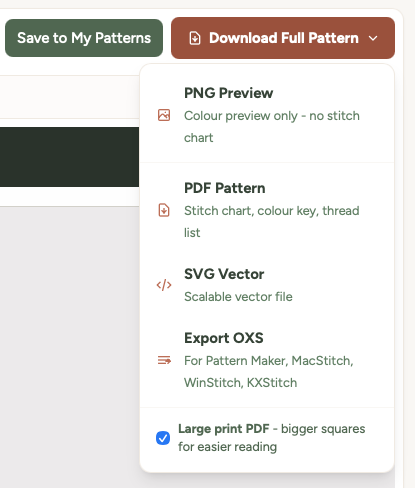
Large print PDF for easier reading
If you find the standard pattern chart hard to read while you're stitching - whether that's because of dim lighting, tired eyes, low vision, or just preferring bigger squares - turn on the Large print PDF option before downloading.
You'll find the toggle inside the Download Full Pattern dropdown menu, just below the file format options. Tick it, choose whether you want a colour or black-and-white chart, then click PDF Pattern.
What changes in large-print mode
- Squares are about 5mm wide - roughly twice the area of the standard chart, matching commercial large-print cross stitch publications.
- Grid numbers, page headers, and the thread colour list all scale up so the whole document reads consistently.
- The pattern splits across more pages to keep the squares big - typically 1.5x to 2x as many pages as the standard download.
- The chart style choice still applies - download either colour pages or black-and-white symbol pages.
The downloaded file name starts with large-print- so you can tell it apart from the standard one in your downloads folder.
Tip: Large-print PDFs work well printed on bigger paper too - try A3 if your printer supports it, or take the file to a print shop. Each page is laid out for US Letter / A4 by default but scales cleanly.
Was this guide helpful?
Still need help?
Send us a message and we'll get back to you as soon as we can. You can also reply to any email from Xstitchify.