Guides
How to Use the QR Generator
Yes, you read that right - you can stitch a QR code that actually scans. The QR Generator creates cross-stitch patterns from URLs, WiFi passwords, or any text. When you stitch it with high-contrast thread, phones can scan it right off the fabric. It's genuinely one of the most fun things you can make.
What you can encode
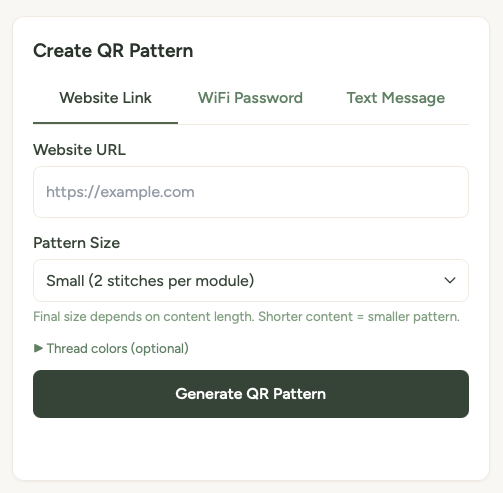
The QR Generator has three tabs for different types of content:
- Website Link - enter any web address. When someone scans your stitched QR code, it opens that link on their phone.
- WiFi Password - enter your network name, password, and security type (WPA/WPA2 or WEP). Scanning the finished piece connects their phone to your WiFi automatically. No more spelling out passwords for guests. There's a show/hide toggle for the password field so you can double-check what you've typed.
- Text Message - enter any plain text (up to 150 characters). It'll display on their phone when scanned.
Creating a QR pattern
- Go to the QR Generator page.
- Choose your tab (Website Link, WiFi Password, or Text Message) and enter the content.
- Pick your pattern size - Small, Medium, or Large. This controls how many stitches each QR module takes up (2, 3, or 5 stitches per module). Larger means easier to stitch but a bigger finished piece.
- Optionally, choose custom thread colours for the dark and light squares using the colour pickers.
- Click Generate QR Pattern.
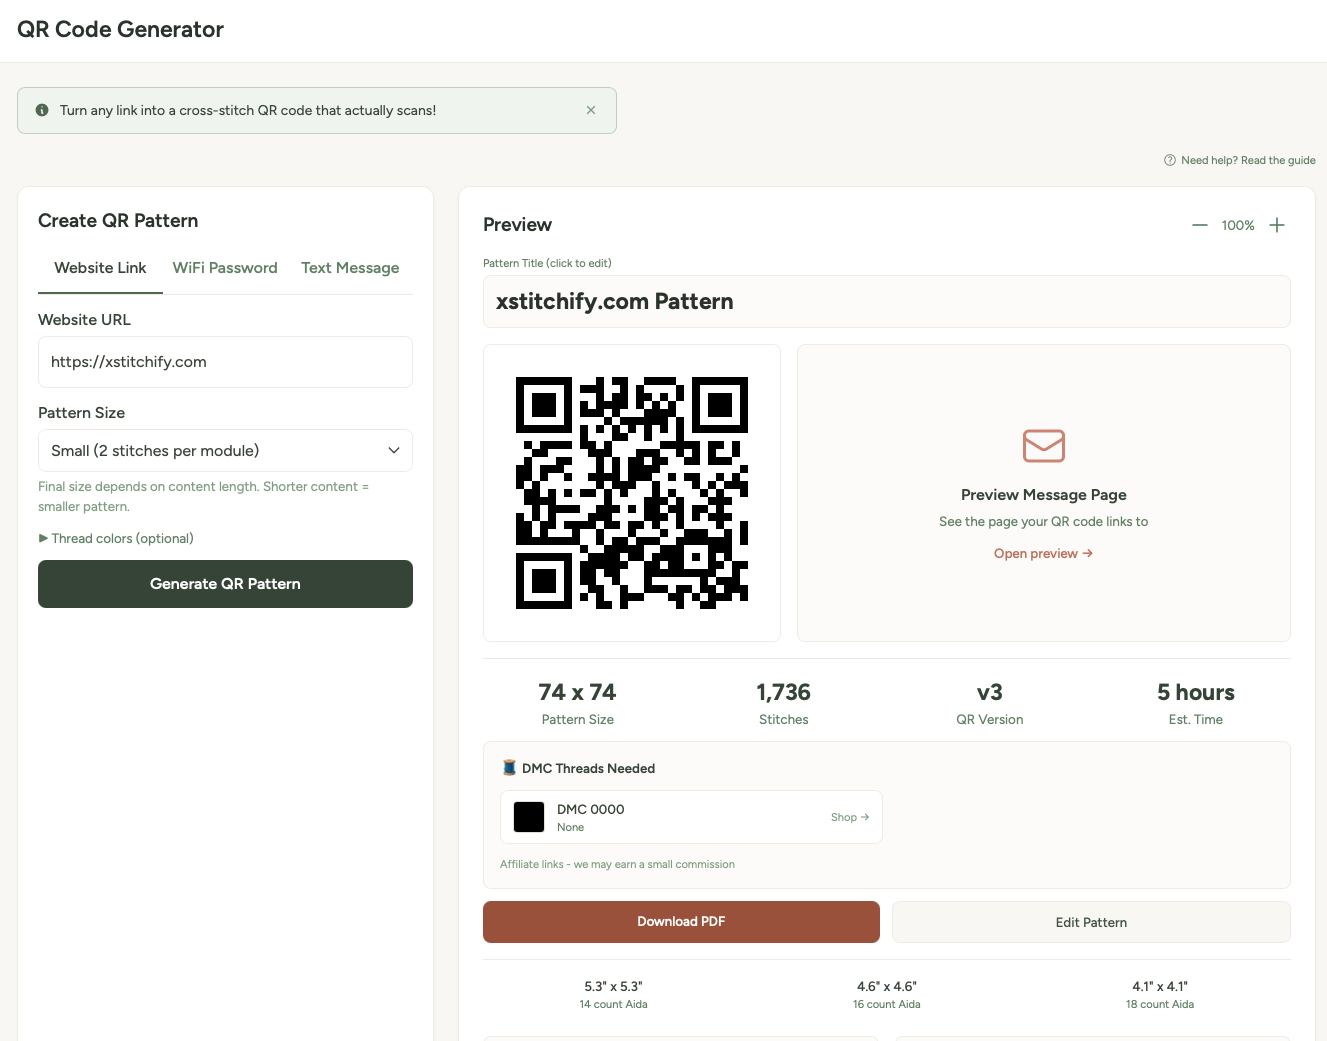
- Your pattern appears with a preview, stats, thread list, and download buttons.
Choosing colours
Pick a colour for the dark squares and one for the light squares using the colour pickers - the matched DMC thread code appears beside each so you know exactly what thread to buy. The contrast between the two colours is the most important factor for scannability - more on that below.
But here's the important bit: the higher the contrast between your two colours, the better your QR code will scan. Black and white is the gold standard. Very dark navy on white works too. Pastel pink on cream? That's going to be tricky for a phone to read.
Rule of thumb: If you'd struggle to see the pattern from a few feet away, a phone camera will struggle too. Stick to a very dark colour on a very light colour for reliable scanning.
Testing your QR code
Before you commit hours of stitching, test the QR code. The preview on screen should scan with your phone camera. Open your camera app, point it at the screen, and check that the link or WiFi connection works correctly.
If it doesn't scan from the screen, it won't scan when stitched either - so adjust your colours or content and try again.
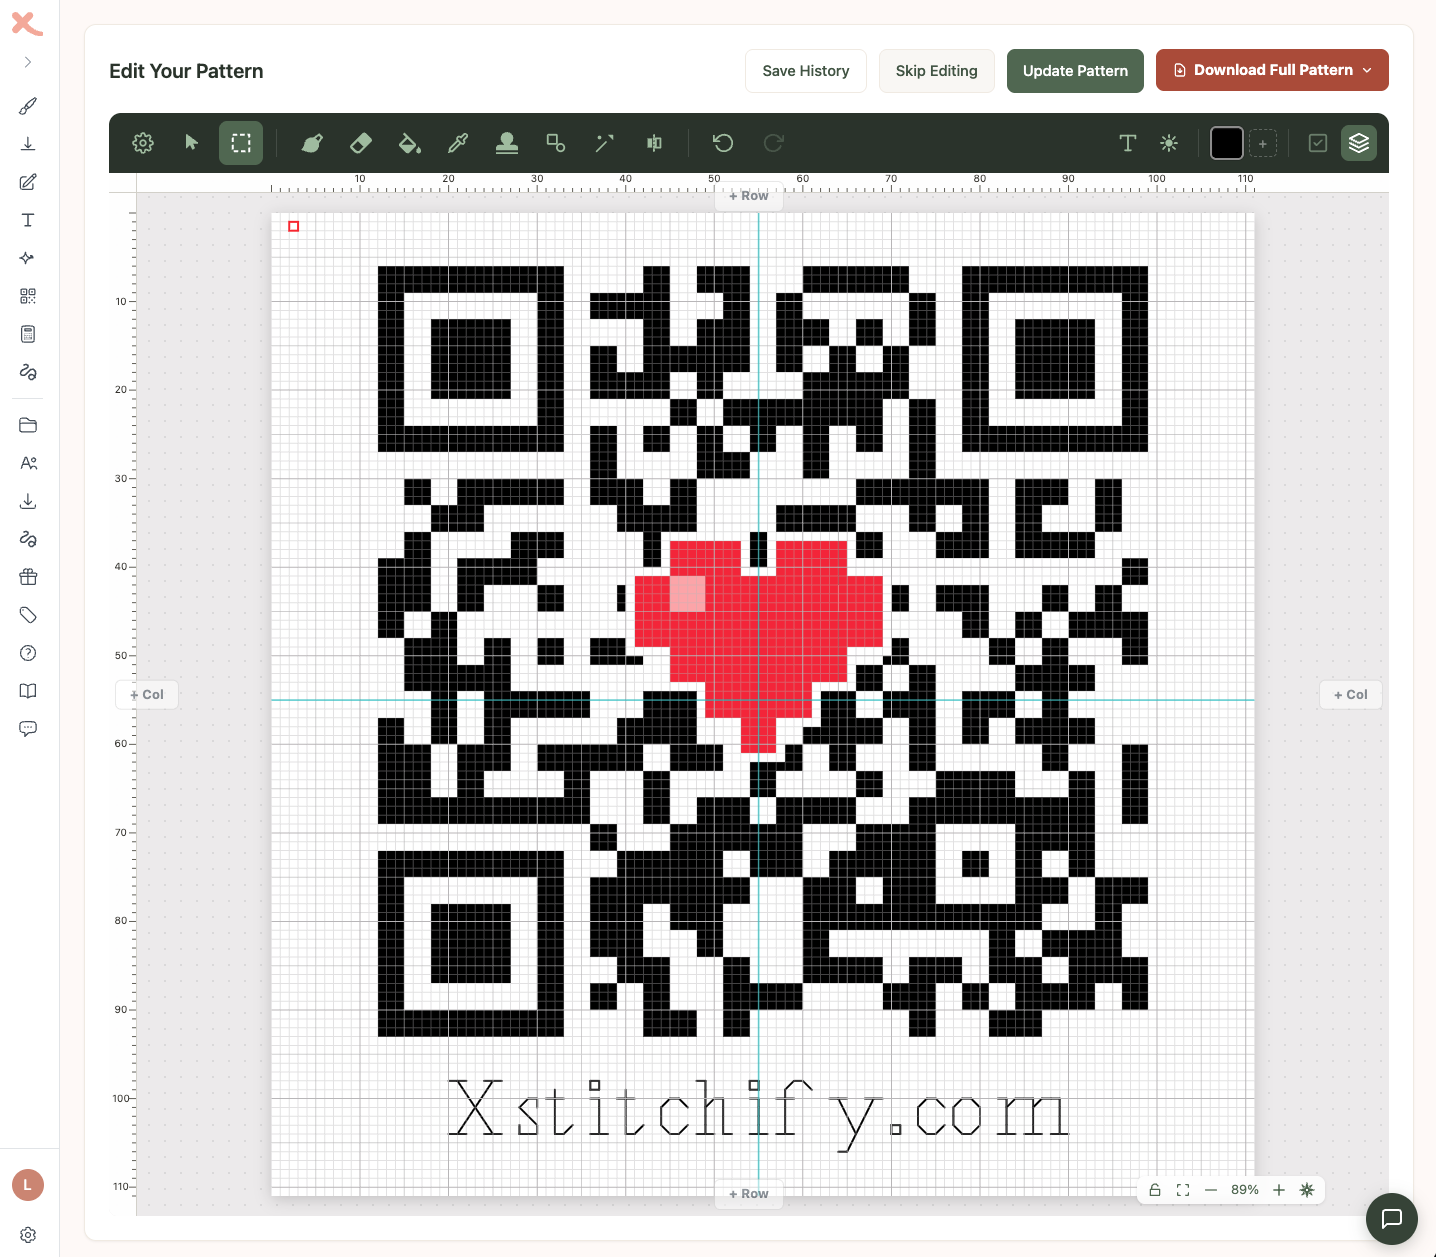
Customising your QR pattern
After generating a QR code, click Edit Pattern to open it in the editor. You can use the same tools as the rest of Xstitchify: add text below the code, draw a border, change colours, or place a small motif on top as a separate layer.
This is especially useful when the QR code is part of a custom gift or display piece. Add names and dates for a wedding sampler, a small WiFi symbol for a guest password sign, a music note for a favourite song link, a camera icon for a wedding photo album, or colours that match the event theme. The extra detail helps people understand what the code is for before they scan it.
Scan-test every edit. Text outside the QR code is safest. Decorations over the code can work because QR codes include error correction, but they can also stop the code scanning depending on the URL length, pattern size, colours, and stitch accuracy. Scan the pattern after each change before you stitch it.
Fun ideas for QR patterns
- WiFi password for guests - stitch it, frame it, hang it by the door. No more "what's the WiFi password?" ever again.
- Rick Roll - you know you want to. Stitch a QR code that links to "Never Gonna Give You Up" and frame it innocently on the wall.
- Wedding or party photos - link to a shared photo album. Stitch the QR code onto a wedding sampler or party favour, then customise it with names, the date, hearts, rings, flowers, or the wedding colours.
- Anniversary gifts - make a QR code that opens a favourite song, a private video message, a shared photo album, or the place you first met. Fabric-themed anniversaries are a natural fit: cotton is commonly used for the 2nd anniversary, wool for the 7th, silk or linen for the 12th, and lace for the 13th, depending on the gift list you follow.
- Etsy and custom gift orders - create personalised QR patterns for weddings, anniversaries, new homes, long-distance relationships, memorial pieces, nursery gifts, or craft fair displays. Add a small icon or text label so the finished piece feels designed rather than just functional.
- Your website or portfolio - a stitched QR code for your business card or craft fair display.
- Secret messages - use the text tab to encode a hidden message. Only people who scan it will know what it says.
Tips for successful QR stitching
High contrast is everything. Black (DMC 310) on white (B5200) is the most reliable combination. If you want colour, go very dark on very light.
Test before you stitch. Always scan the on-screen preview with your phone first. If it works on screen, it'll work in thread.
Keep URLs short. Shorter content makes simpler QR codes with fewer stitches. Use a URL shortener if your link is long.
Bigger is more forgiving. Choose the Large pattern size if you're not confident about your stitch tension being perfectly even. More stitches per module means small inconsistencies matter less.
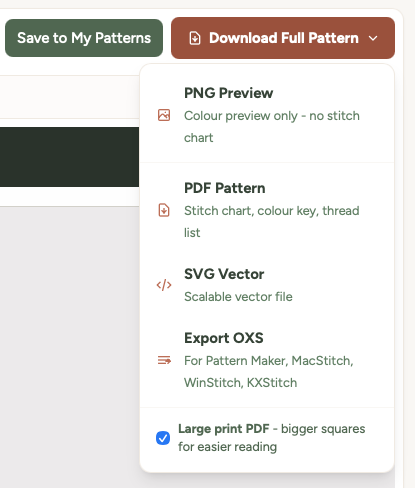
Large print PDF for easier reading
If you find the standard pattern chart hard to read while you're stitching - whether that's because of dim lighting, tired eyes, low vision, or just preferring bigger squares - turn on the Large print PDF option before downloading.
You'll find the toggle inside the Download Full Pattern dropdown menu, just below the file format options. Tick it, choose whether you want a colour or black-and-white chart, then click PDF Pattern.
What changes in large-print mode
- Squares are about 5mm wide - roughly twice the area of the standard chart, matching commercial large-print cross stitch publications.
- Grid numbers, page headers, and the thread colour list all scale up so the whole document reads consistently.
- The pattern splits across more pages to keep the squares big - typically 1.5x to 2x as many pages as the standard download.
- The chart style choice still applies - download either colour pages or black-and-white symbol pages.
The downloaded file name starts with large-print- so you can tell it apart from the standard one in your downloads folder.
Tip: Large-print PDFs work well printed on bigger paper too - try A3 if your printer supports it, or take the file to a print shop. Each page is laid out for US Letter / A4 by default but scales cleanly.
Was this guide helpful?
Still need help?
Send us a message and we'll get back to you as soon as we can. You can also reply to any email from Xstitchify.