Guides
How to Use Layers
Layers let you build a pattern as separate elements - background, motifs, text, reference images - and edit each one independently without disturbing the rest. Think of it like stacking sheets of tracing paper.
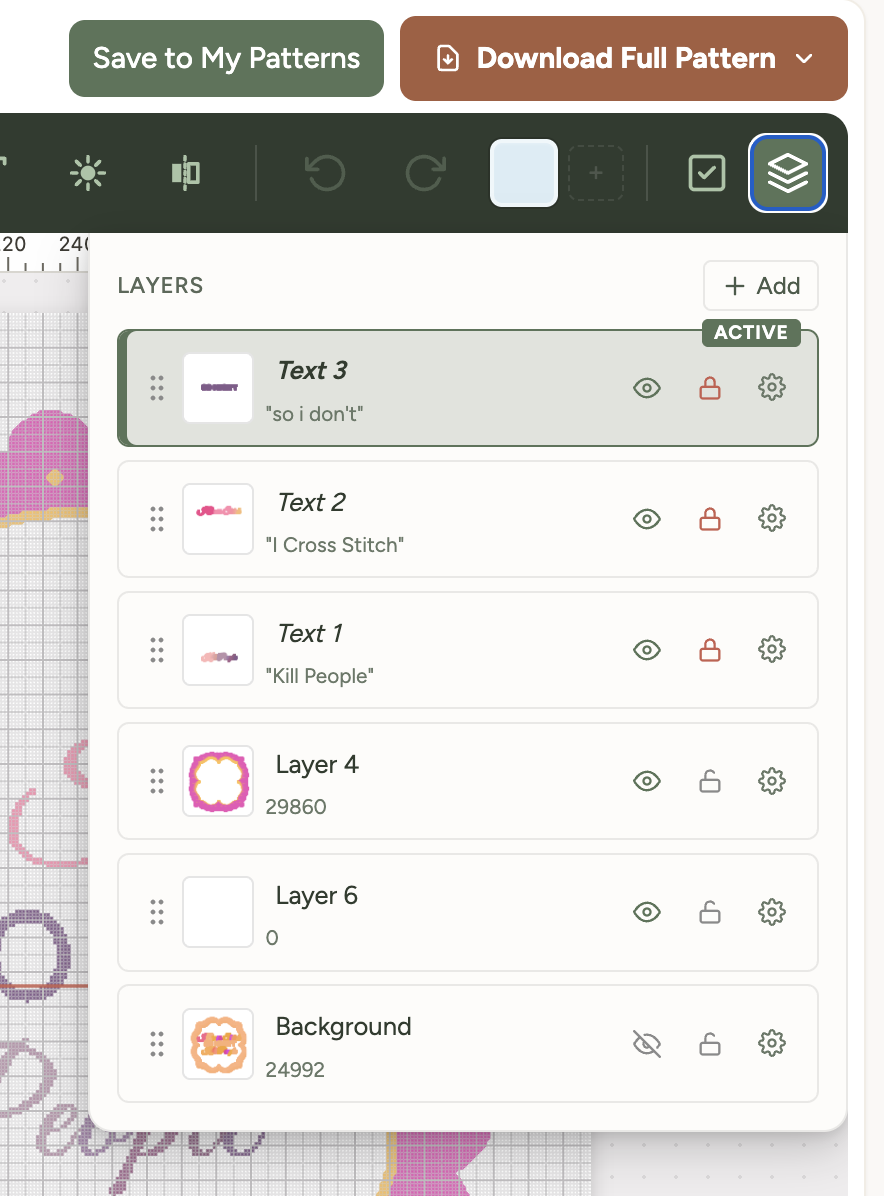
The layers panel lives in the editor toolbar - tap the stacked-squares icon to open it. From there you can add new layers, reorder them, fade them, lock them, and access a full menu of layer operations via the gear icon on each layer.
The four layer types
Xstitchify has four layer types and each behaves slightly differently:
- Stitch layers - the regular kind. Draw with the brush, fill, stamps and shapes. Most of your pattern lives here. You can have as many stitch layers as you like.
- Text layers - created automatically when you use the text tool. Each text block sits on its own layer so you can move, restyle or replace it without affecting anything else.
- Sketch layers - made by the sketch pencil. Sketch strokes are reference lines that don't become stitches - they're for planning a composition before you commit. Hide or delete the sketch when you've finished stitching over it.
- Image layers - made when you upload a reference image. Lock the layer and reduce its opacity to use the image as a guide while you trace stitch by stitch on a separate stitch layer above.
Layer operations
Each layer has a row in the panel with quick controls and a settings (gear) menu for everything else.
Quick controls on each layer
- Drag handle - the six dots on the left. Drag a layer up or down to change its order in the stack. Layers higher in the panel appear in front on the canvas.
- Visibility (eye icon) - toggle a layer's visibility. Useful for comparing variations or focusing on one element without distractions.
- Lock (padlock icon) - prevent accidental edits. Locked layers stay visible but can't be drawn on or moved. Essential for reference images and finished sections you don't want to disturb.
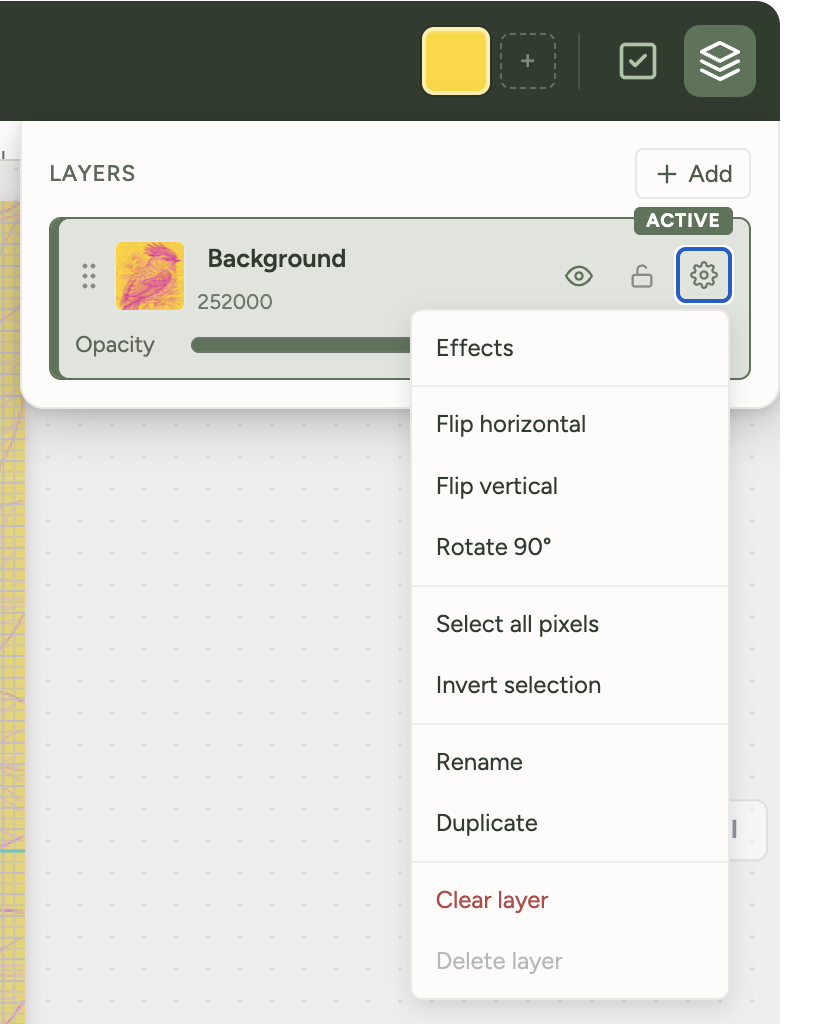
- Opacity slider - fade the layer between 0% and 100%. Useful for tracing (drop a reference image to around 40-60%), comparing two colour schemes side by side, or building up effects.
- Settings (gear icon) - opens the full operations menu.
The settings menu
- Effects - apply visual adjustments to the layer's contents.
- Flip horizontal / Flip vertical - mirror the whole layer left-right or top-bottom.
- Rotate 90° - turn the layer 90 degrees clockwise. Apply repeatedly for 180° or 270°.
- Select all pixels - select every stitch on this layer at once, useful before moving or copying everything.
- Invert selection - flip the current selection so everything previously unselected becomes selected.
- Rename - give the layer a useful name like "sky", "house" or "text". Much easier to navigate than "Layer 1", "Layer 2", "Layer 3" when you've got six layers stacked.
- Duplicate - make an exact copy of the layer. Try a colour variation, or back up the original before risky changes.
- Clear layer - empty all the content from the layer but keep the layer itself.
- Delete layer - remove the layer entirely.
Tip: Name your layers as you go. Once a design has six or seven layers stacked up, descriptive names ("background", "house", "text", "border") make hunting for the right one much faster than scanning numbered labels.
A practical workflow
Here's how to approach a typical pattern with a background, a main motif and some text:
- Bottom layer - fill this with your background colour or pattern. Name it "background".
- Middle layer - draw or stamp your main motif here. Name it descriptively, like "house" or "flowers".
- Top layer - add your text using the text tool, which creates its own text layer automatically.
With this structure you can hide the background to focus on the motif, swap in a different background colour without touching anything else, or nudge the text into a better position without worrying about the design underneath.
Two specific tricks worth knowing
Sketch first, stitch second
Use the sketch pencil to rough out a composition on a sketch layer first - no stitches placed yet, just an exploratory drawing. Add a stitch layer above and refine the design into actual stitches using the sketch as a guide. When you're done, hide or delete the sketch layer.
This works especially well for original designs where you're not sure of the layout yet. Sketch loosely, get the proportions right, then commit to stitches once you're happy.
Trace from a reference image
Upload an image as an image layer, lock it so you don't accidentally move it, drop the opacity to around 40-60% so it sits as a ghost behind the grid, then add a new stitch layer on top and trace the image stitch by stitch.
The pressure brush is brilliant for tracing if you have a stylus, but the regular brush works just as well for non-stylus tracing.
Personalised gifts - the strongest use case
Layers really shine when you're making personalised gifts. Build your decorative design on the bottom layers (background, motif, border), then put the recipient's name on a text layer at the top. When you make the same design for someone else, just edit the text layer with the new name - the decorative work stays exactly as it was.
This works brilliantly for:
- Wedding samplers with the couple's names and the date
- Baby name announcements where the design is fixed but the name and birth details change
- Christmas ornaments personalised per family member
- House warming gifts with the new address or family name
- Anniversary keepsakes
Keyboard tips
- Click on a layer's name area to make it the active layer (what you're drawing on)
- Hold the cmd/ctrl key while clicking layers to select multiple for group moves
- Hide a layer temporarily to see what's underneath without deleting it
Was this guide helpful?
Still need help?
Send us a message and we'll get back to you as soon as we can. You can also reply to any email from Xstitchify.