Guides
How to Use the AI Pattern Generator
The AI Pattern Generator creates cross-stitch patterns from a text description. Describe what you want - "a cat sitting on a windowsill at sunset" or "a simple Christmas tree with snow" - and AI generates a pattern for you, complete with DMC thread colours. It's the quickest way to go from an idea to a pattern without needing an image to upload.
Describing your pattern
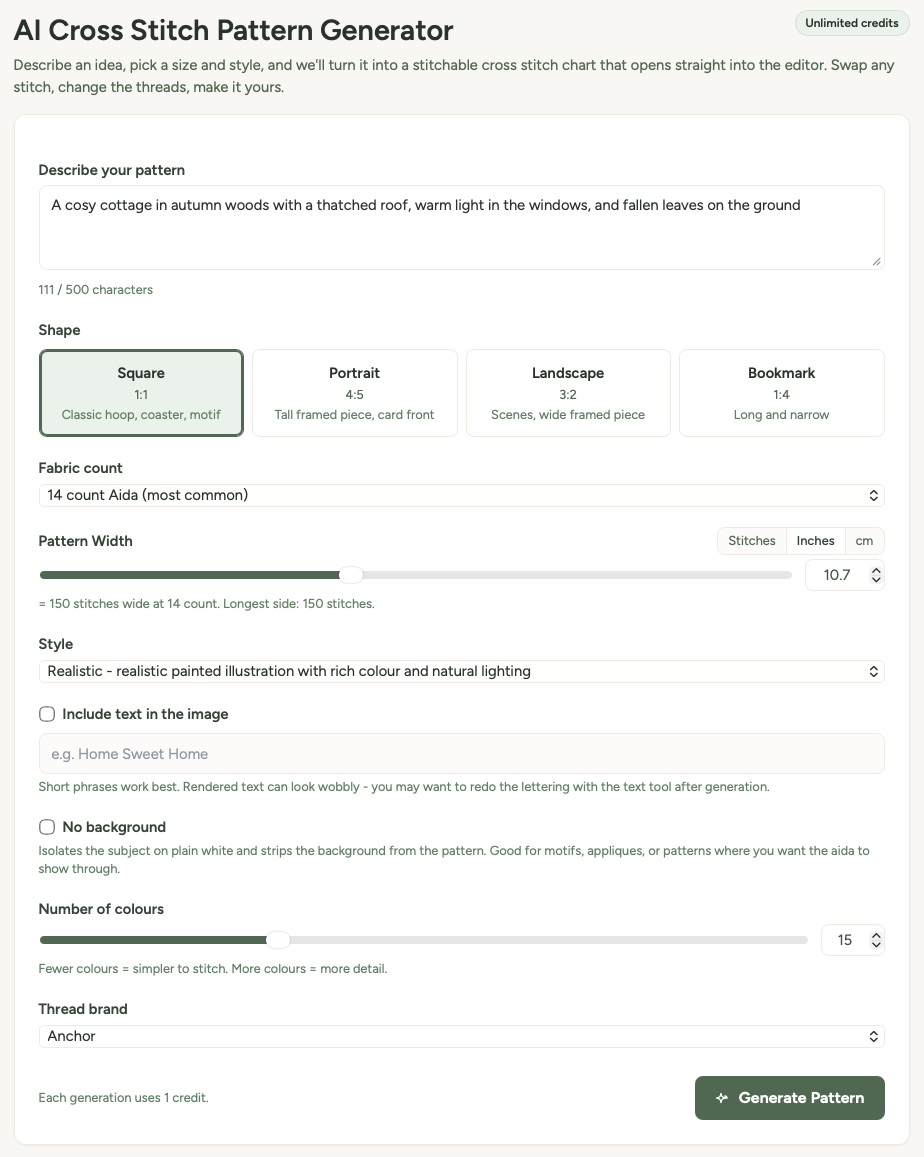
- Go to the AI Pattern Generator page.
- Type a description of what you want in the text box (up to 500 characters). Be specific - "a red fox sitting in autumn leaves" will give better results than just "fox".
Tip: The more specific your description, the better the result. Include colours, mood, and composition. "A small cottage with a thatched roof surrounded by wildflowers, folk art style" will give you something much more interesting than "a house".
Choosing a shape
Pick the shape of your finished pattern:
- Square - equal width and height, great for coasters and framed pieces
- Portrait - taller than wide, good for figures, animals, and vertical compositions
- Landscape - wider than tall, good for scenes, horizons, and wide compositions
- Bookmark - tall and narrow, perfect for bookmark projects
Setting the size
Fabric count
Choose your Aida fabric count (11 through 28, with 14 count as the default). This affects the finished size preview - it shows how big your pattern will be in real life on that fabric.
Pattern width
Use the slider to control how wide the pattern will be. You can enter dimensions in stitches, inches, or centimetres using the unit toggle - values convert automatically based on your chosen fabric count.
A hint below the slider shows the full dimensions in all units so you can see exactly how big the finished piece will be. The height is calculated automatically based on the shape you picked.
Style and options
Art style
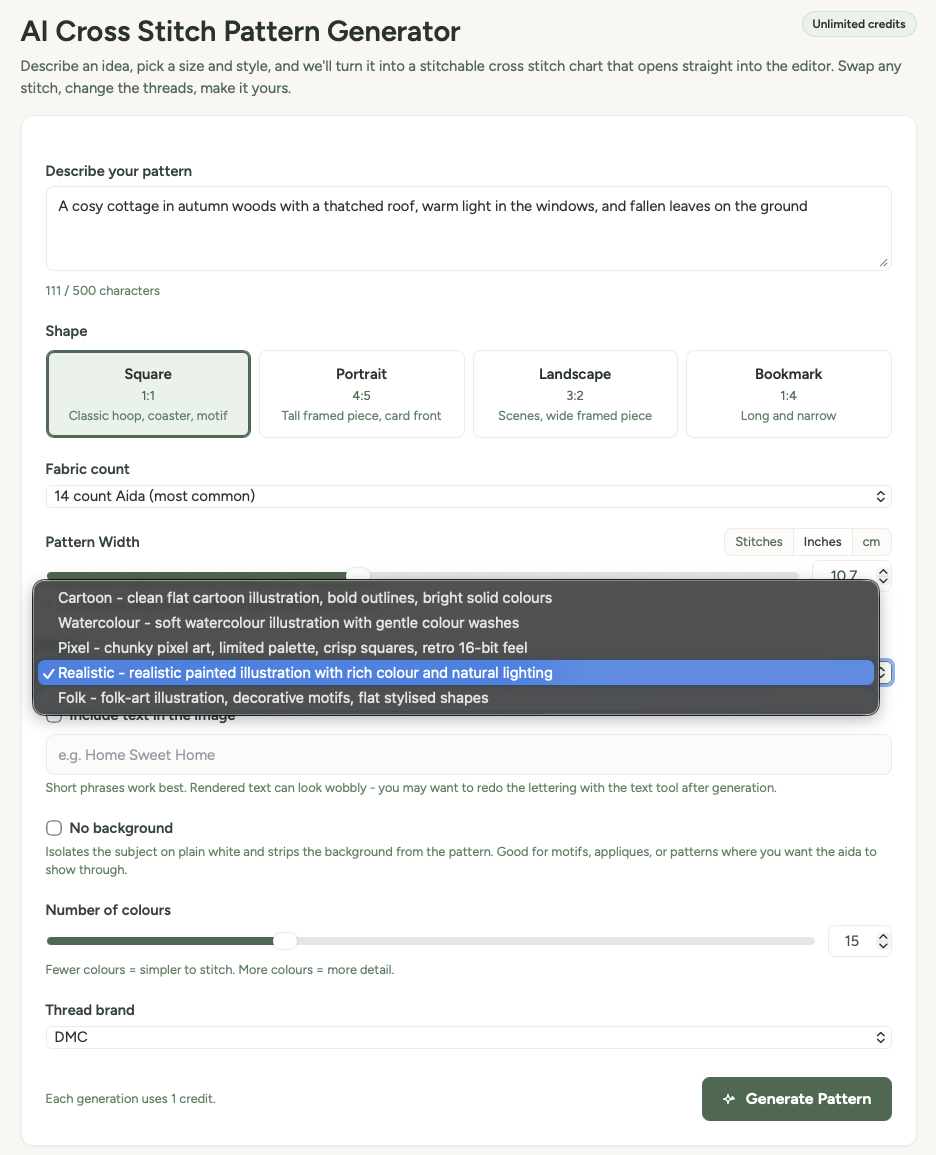
The style dropdown lets you steer the visual style of the generated pattern:
- Cartoon - clean flat illustration with bold outlines and bright solid colours
- Watercolour - soft, painterly look with gentle colour washes
- Pixel - chunky retro pixel art with crisp squares and a limited palette
- Realistic - realistic painted illustration with rich colour and natural lighting
- Folk - folk-art illustration with decorative motifs and flat stylised shapes
Include text
Tick the Include text checkbox to add text to your pattern (up to 80 characters). This is great for adding a name, date, or short message alongside the AI-generated image.
No background
Tick No background to isolate the subject without a background colour. This gives you just the main subject on plain fabric - perfect if you want to stitch the motif on its own.
Number of colours
Choose how many thread colours the pattern should use, from 4 to 40. Fewer colours means a simpler, easier-to-stitch pattern. More colours means more detail and subtlety.
Thread brand
Pick your preferred thread brand - DMC, Anchor, Madeira, or Cosmo. The generated pattern will use real colour codes from that brand.
Generating your pattern
- Click Generate Pattern.
- Generation takes 10-30 seconds - you'll see a loading indicator while it works.
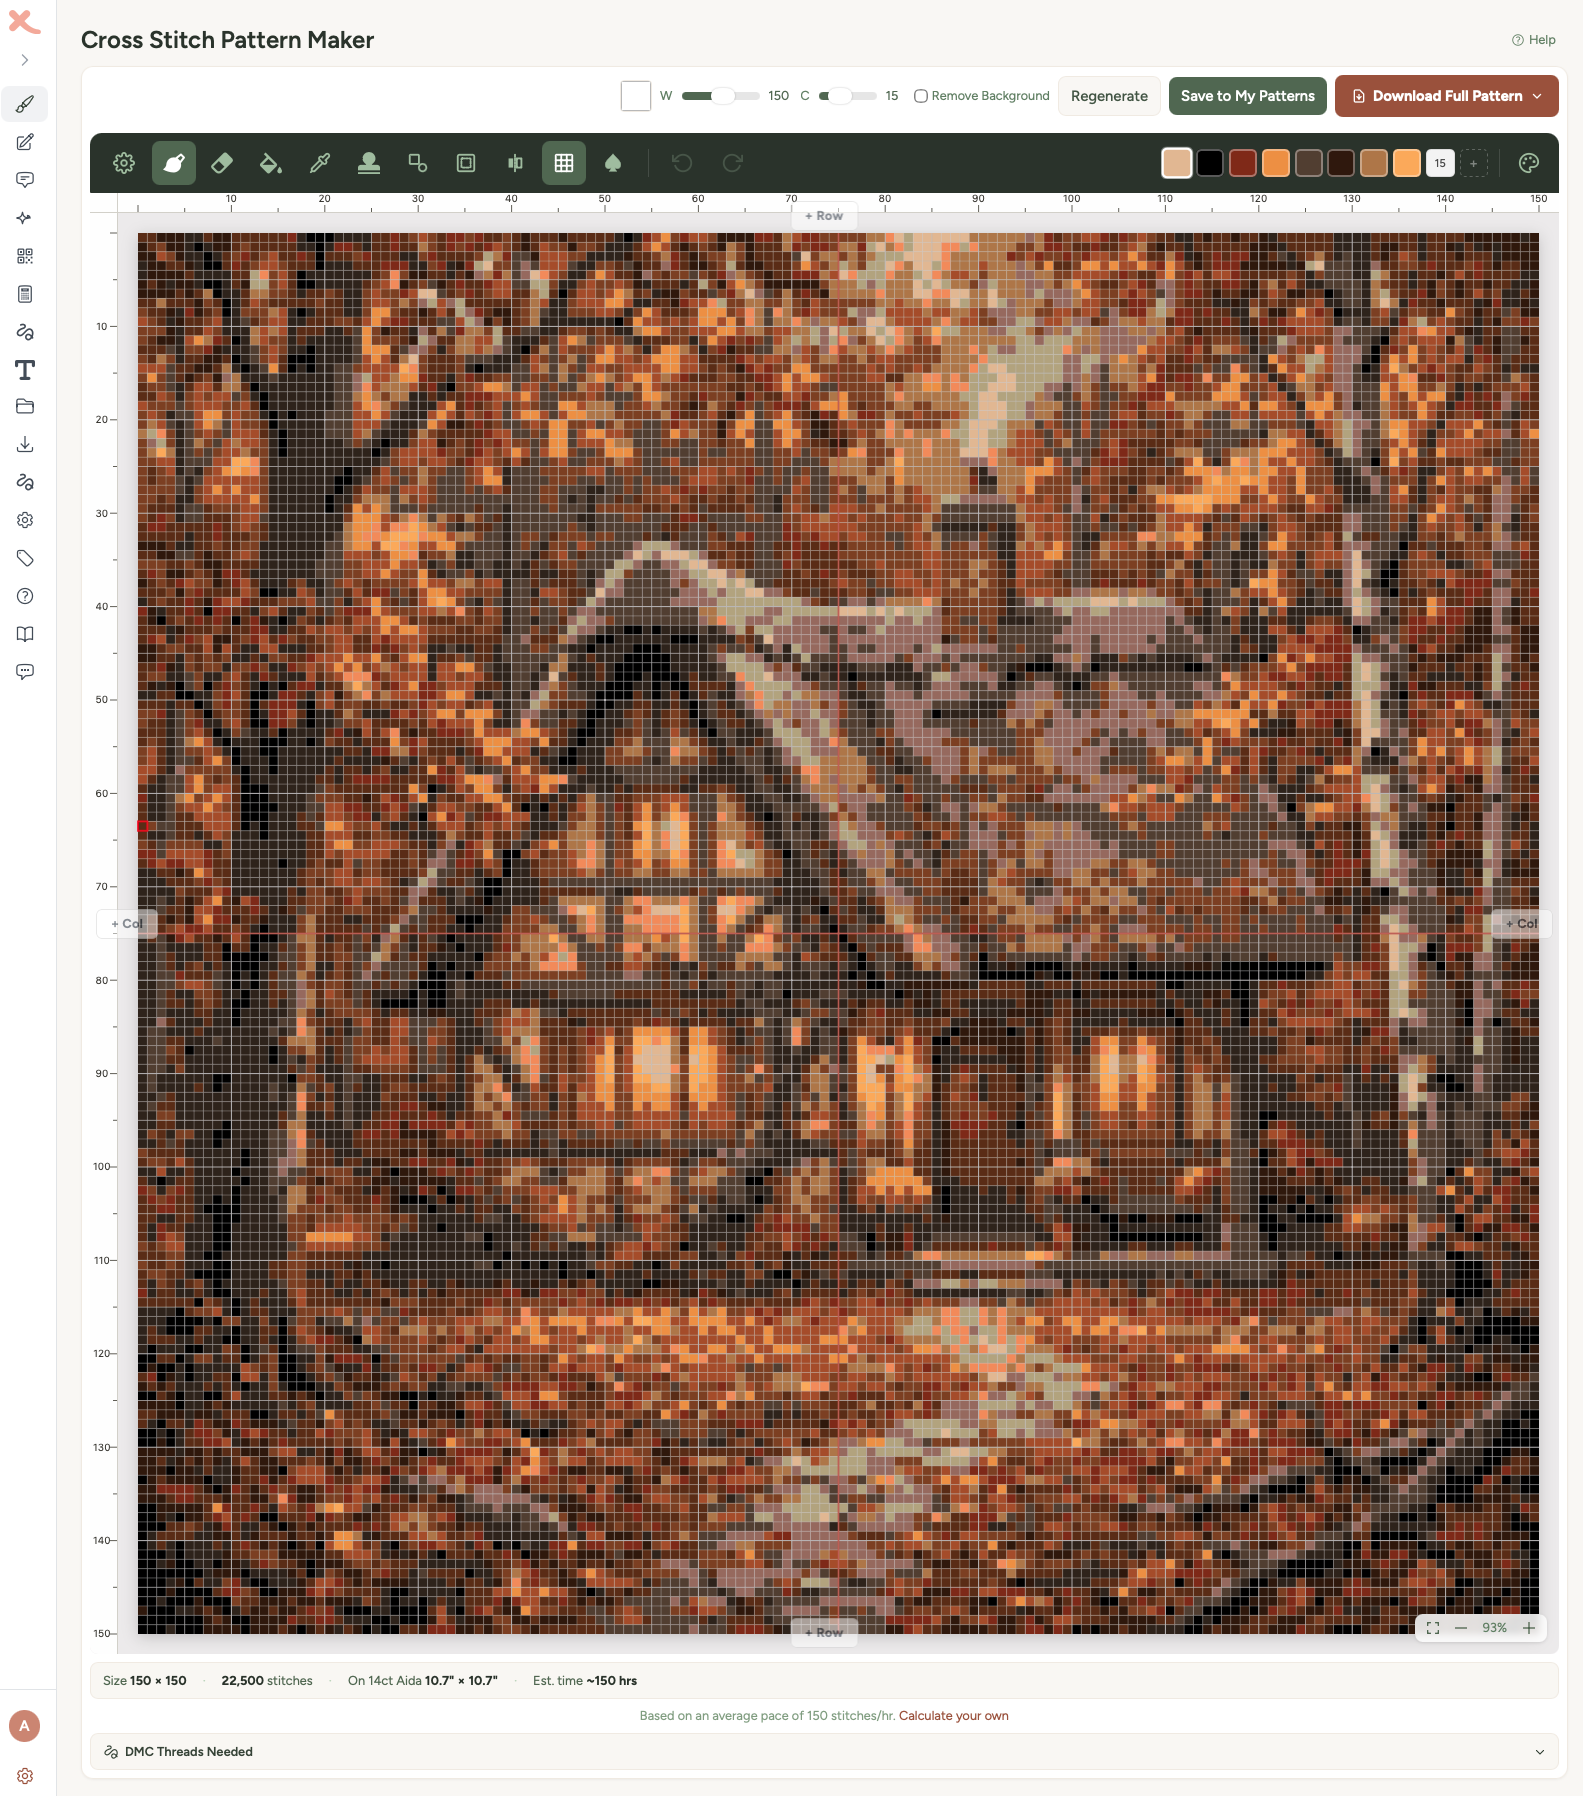
- When it's ready, you're taken straight to the editor where you can see your pattern and make any adjustments.
Not quite what you had in mind? Go back and tweak your description, style, or colour count and try again.
Credits
The AI Generator uses credits - each generation costs one credit. Your remaining credits are shown at the top of the page.
- Subscribers get credits included with their plan.
- You can also buy credit packs (30, 75, or 200 credits) that never expire.
Tips for great AI patterns
Be specific. "A tabby cat curled up on a blue cushion" will give you a much better result than "cat". Include colours, poses, settings, and mood.
Try different styles. The same description can look completely different in cartoon vs watercolour vs pixel art. Experiment - it only costs one credit per attempt.
Start with fewer colours. 8-15 colours is a sweet spot for most patterns. You can always regenerate with more if the result looks too simplified.
Use "no background" for motifs. If you want a standalone image (like a flower or animal) to stitch on plain fabric, tick the no-background option. Otherwise you'll get a full scene with background colours.
Edit after generating. The AI gives you a starting point - you can then use the pattern editor to clean up edges, change colours, or add details by hand.
Large print PDF for easier reading
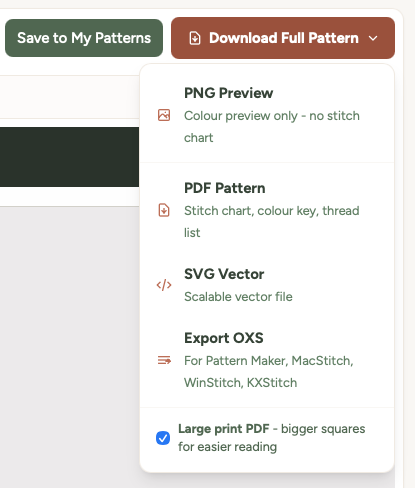
If you find the standard pattern chart hard to read while you're stitching - whether that's because of dim lighting, tired eyes, low vision, or just preferring bigger squares - turn on the Large print PDF option before downloading.
You'll find the toggle inside the Download Full Pattern dropdown menu, just below the file format options. Tick it, choose whether you want a colour or black-and-white chart, then click PDF Pattern.
What changes in large-print mode
- Squares are about 5mm wide - roughly twice the area of the standard chart, matching commercial large-print cross stitch publications.
- Grid numbers, page headers, and the thread colour list all scale up so the whole document reads consistently.
- The pattern splits across more pages to keep the squares big - typically 1.5x to 2x as many pages as the standard download.
- The chart style choice still applies - download either colour pages or black-and-white symbol pages.
The downloaded file name starts with large-print- so you can tell it apart from the standard one in your downloads folder.
Tip: Large-print PDFs work well printed on bigger paper too - try A3 if your printer supports it, or take the file to a print shop. Each page is laid out for US Letter / A4 by default but scales cleanly.
Was this guide helpful?
Still need help?
Send us a message and we'll get back to you as soon as we can. You can also reply to any email from Xstitchify.