Guides
How to Use the Pattern Maker
The Pattern Maker is the heart of Xstitchify. Upload any image - a photo, a drawing, a logo - and it'll turn it into a cross-stitch chart with real DMC thread colours. Here's everything you need to know.
What images work best?
You can upload pretty much anything, but some images give you much better results than others:
- High-contrast images work beautifully - think a dark silhouette against a light background, or a bright flower against green leaves.
- Simple subjects with clear shapes convert more cleanly than busy, detailed scenes.
- Close-up photos tend to look better than wide landscape shots, because there's more detail in the subject.
- Illustrations and logos often make fantastic patterns because they already have clean lines and limited colours.
Tip: Before uploading, crop your image to focus on the part you actually want to stitch. A tightly cropped photo of your dog's face will give you a much better pattern than a wide shot of your dog sitting in a field.
Uploading your image
- Go to the Pattern Maker page.
- Either drag and drop your image onto the upload area, or click it to browse your files.
- JPG, PNG, and most common image formats are supported. The maximum file size is 25MB.
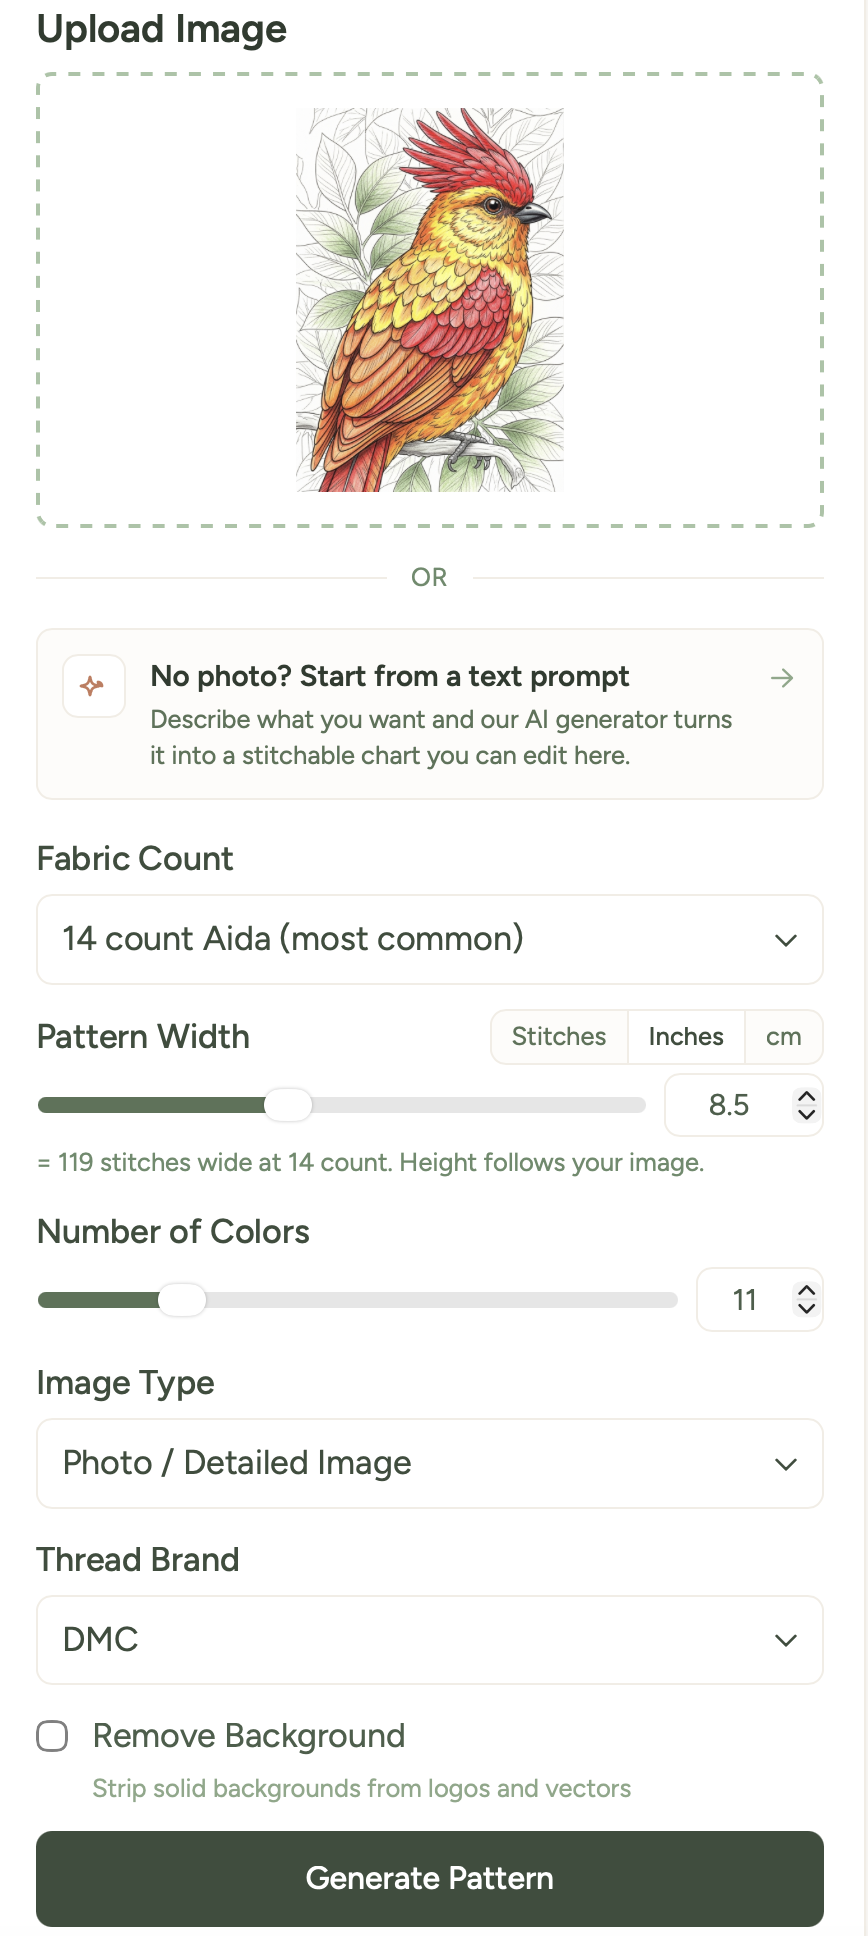
Setting the size and colours
Once your image is loaded, you'll see the settings controls below it:
Fabric count
Choose your Aida fabric count (14 count is the most common). This affects the finished size preview - it shows how big your pattern will be in real life on that fabric.
Pattern width
This slider controls how wide your finished pattern will be, measured in stitches. You can also switch to inches or centimetres using the unit toggle. A higher number means more detail but a bigger project. For a first try, somewhere around 50-80 stitches wide is a nice balance.
Number of colours
This controls how many different thread colours your pattern will use. You can choose anywhere from 1 to 150 colours while the expanded palette is being tested. Fewer colours are usually easier to stitch, and similar shades may be grouped automatically to reduce confetti.
Here's the thing most people don't expect: fewer colours often looks better. A 6-colour pattern can look incredibly striking, while a 30-colour version of the same image might look muddy. Start low and increase if you feel like you're losing important detail.
Image type
Tell the converter what kind of image you're uploading - either "Photo / Detailed Image" for photographs or "Vector / Logo / Text" for graphics with clean lines and flat colours. This helps the algorithm pick the best conversion approach.
Thread brand
Choose which thread brand to use for colour matching - DMC, Anchor, Cosmo, Madeira, or "Best Match" to use all brands. The generated pattern will use real colour codes from that brand so you know exactly what to buy.
Remove background
Tick this to strip solid backgrounds from logos and vector images. If your image has a plain white or coloured background you don't want in the pattern, this option removes it so you get just the subject on bare fabric.
Generating your pattern
- Once you're happy with your settings, click Generate Pattern.
- The pattern will appear in the preview area. This usually takes just a few seconds.
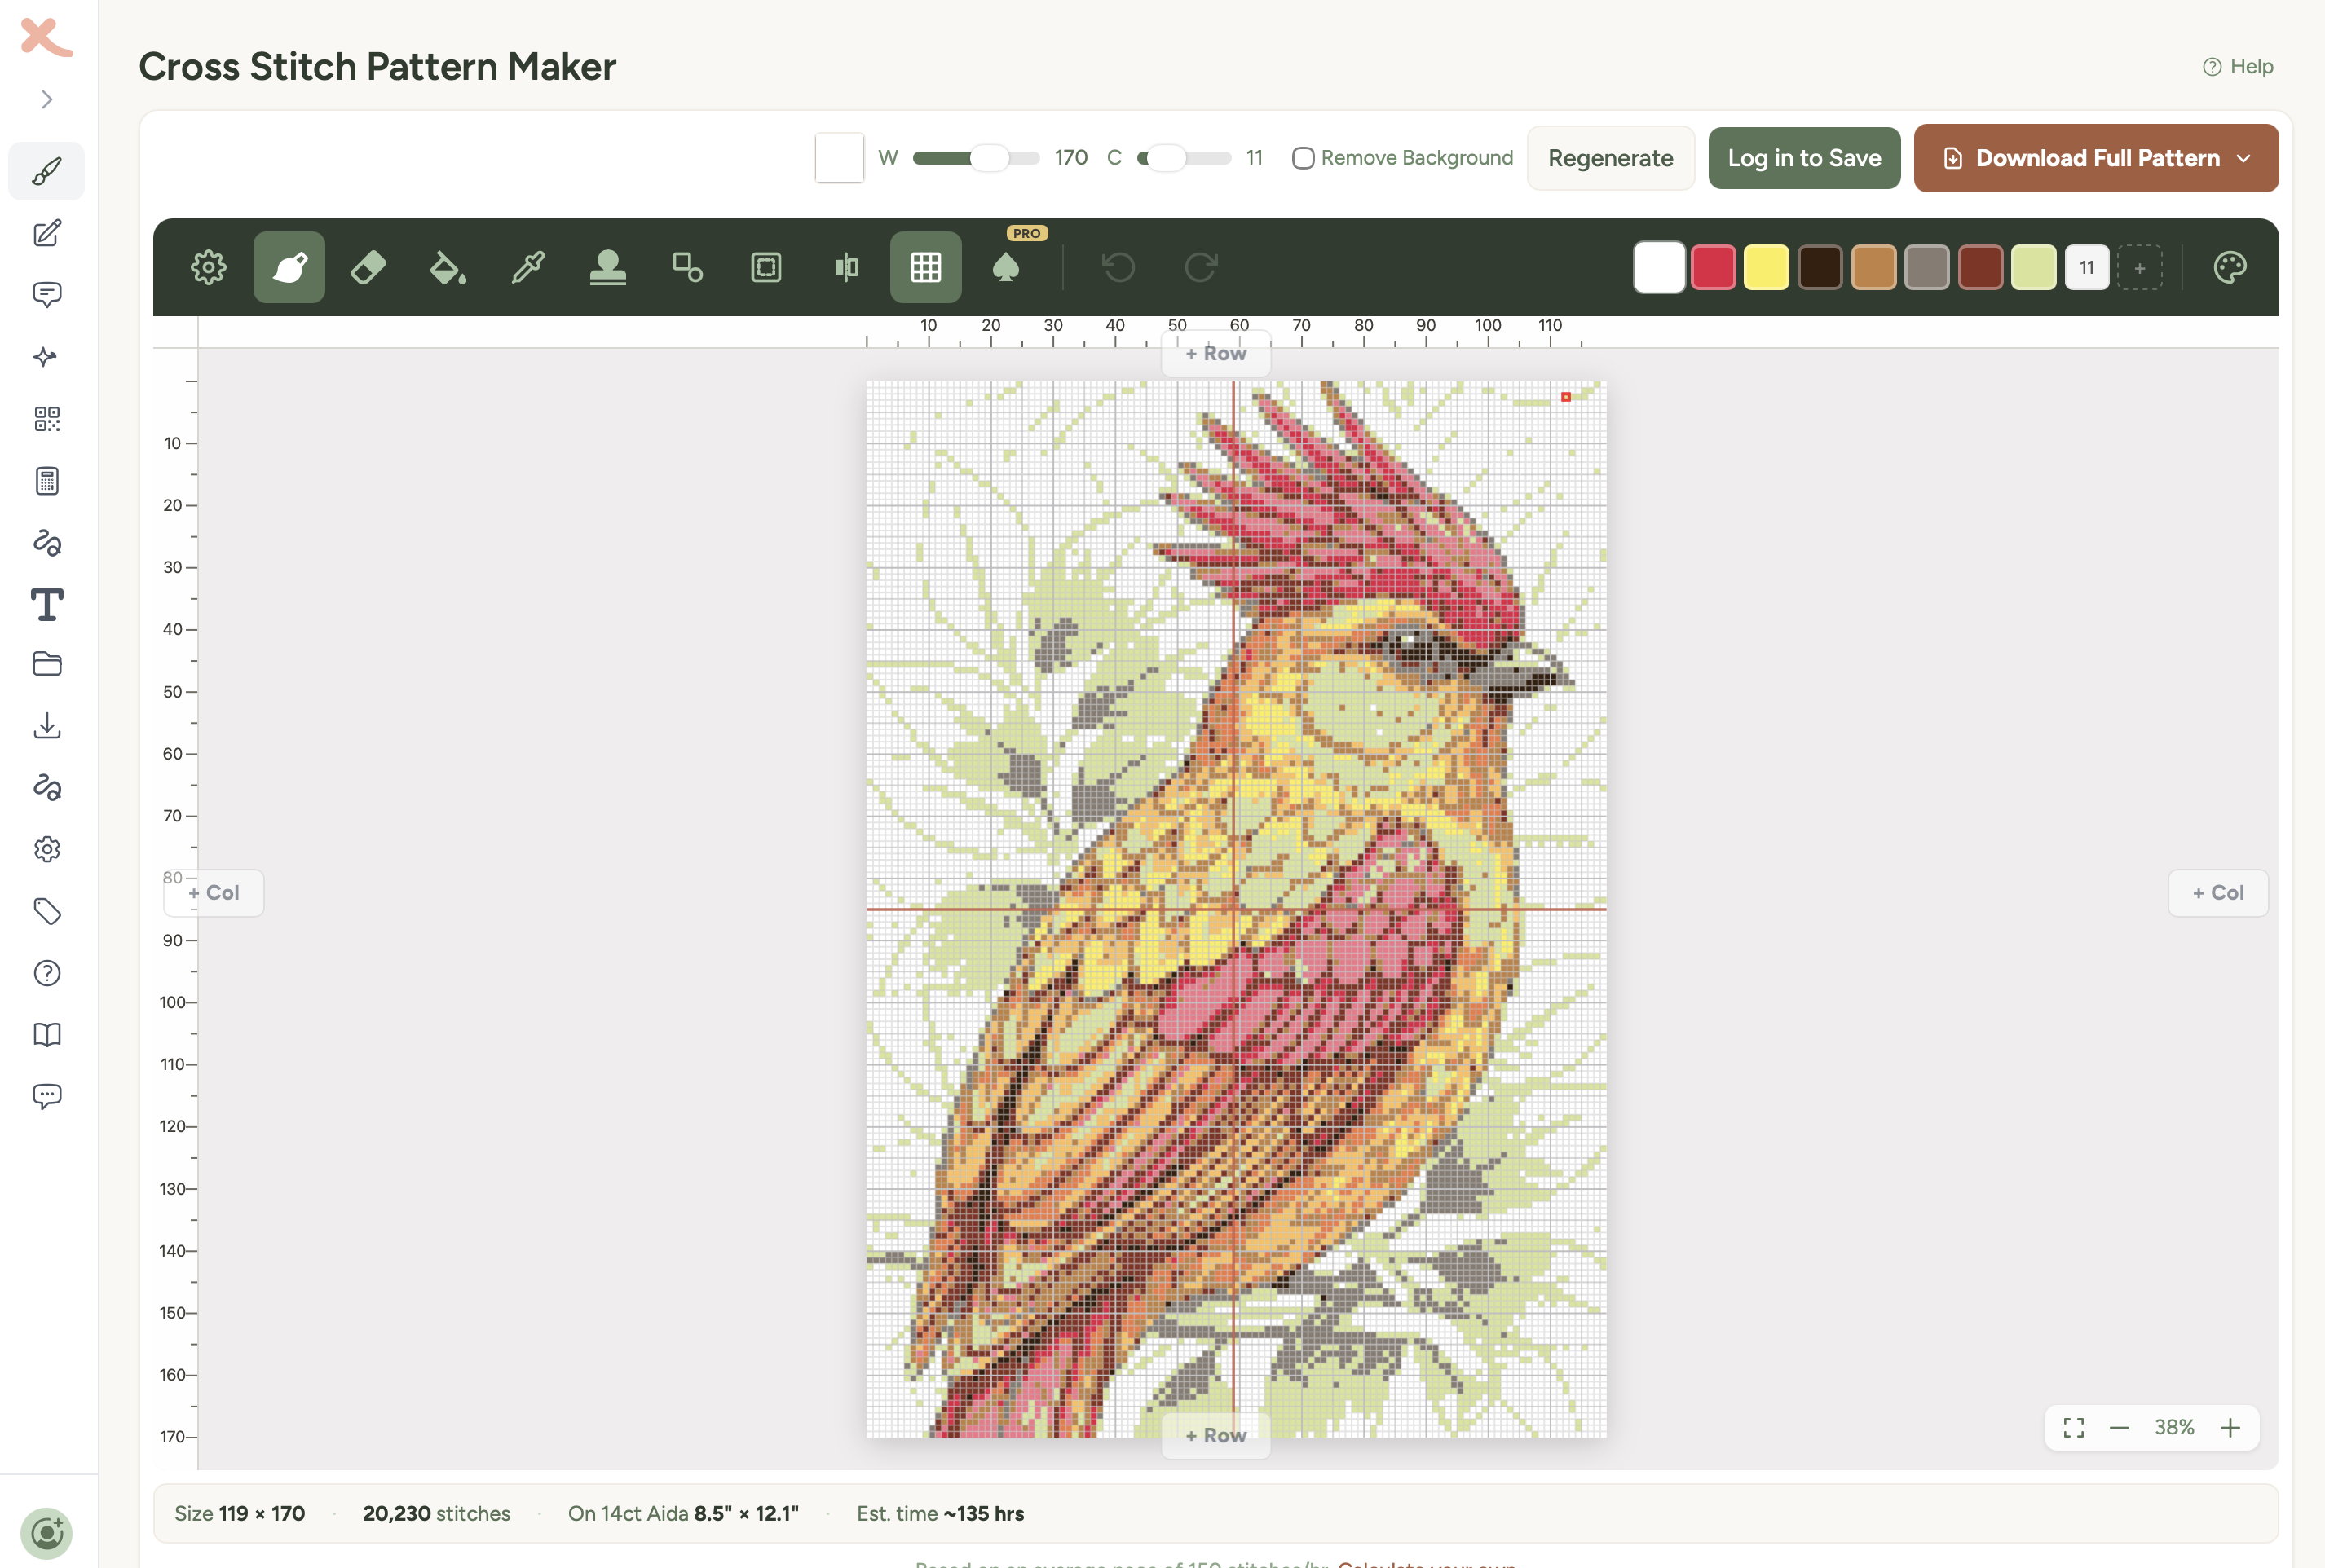
- You'll see a preview of your pattern along with the stats - pattern dimensions, total stitch count, the DMC thread colours, estimated time to stitch, and the finished size on different fabric counts.
After generation: editing, saving, and downloading
Once your pattern is generated, you've got a few options:
- Edit in the editor - opens the full pattern editor where you can draw, erase, fill, change colours, add stamps, and refine your pattern stitch by stitch.
- Regenerate - not happy? Adjust the colour count or width and hit Regenerate. You can try as many variations as you like.
- Save to Library - save the pattern to your account so you can come back to it later.
- Download - grab your pattern as a PDF (with a full chart, thread list, and symbols) or a PNG image.
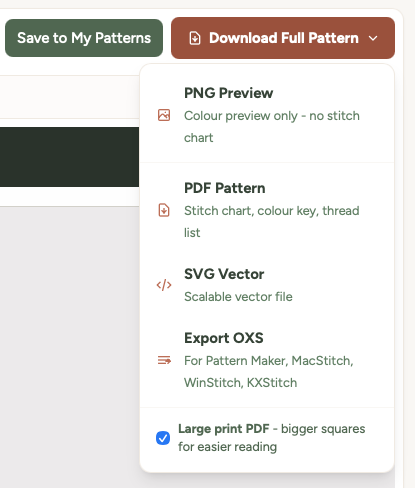
Large print PDF for easier reading
If you find the standard pattern chart hard to read while you're stitching - whether that's because of dim lighting, tired eyes, low vision, or just preferring bigger squares - turn on the Large print PDF option before downloading.
You'll find the toggle inside the Download Full Pattern dropdown menu, just below the file format options. Tick it, choose whether you want a colour or black-and-white chart, then click PDF Pattern.
What changes in large-print mode
- Squares are about 5mm wide - roughly twice the area of the standard chart, matching commercial large-print cross stitch publications.
- Grid numbers, page headers, and the thread colour list all scale up so the whole document reads consistently.
- The pattern splits across more pages to keep the squares big - typically 1.5x to 2x as many pages as the standard download.
- The chart style choice still applies - download either colour pages or black-and-white symbol pages.
The downloaded file name starts with large-print- so you can tell it apart from the standard one in your downloads folder.
Tip: Large-print PDFs work well printed on bigger paper too - try A3 if your printer supports it, or take the file to a print shop. Each page is laid out for US Letter / A4 by default but scales cleanly.
Tips for better patterns
Crop first. The single biggest thing you can do to improve your pattern is to crop the image before uploading. Focus on what matters.
Simpler is better. A clean illustration or a close-up portrait will always convert more beautifully than a busy group photo. Think about what will look good as tiny coloured squares.
Experiment with colour counts. Try your image at 6, 12, and 20 colours. You might be surprised - sometimes a lower colour count creates a more dramatic, graphic look that's actually more appealing (and much easier to stitch).
Try the image type toggle. If your photo isn't converting cleanly, switch between "Photo / Detailed Image" and "Vector / Logo / Text" to see which gives better results for your particular image.
Still seeing confetti? The converter reduces confetti automatically, but some patterns - especially photo conversions with lots of colour transitions - may still have scattered stitches. Use the confetti cleanup brush in the editor to target specific areas after converting.
Was this guide helpful?
Still need help?
Send us a message and we'll get back to you as soon as we can. You can also reply to any email from Xstitchify.