Guides
How to Use the Designer
The Designer lets you draw your own cross-stitch patterns from scratch. You set up a canvas, optionally add a decorative border, and then open the full pattern editor to draw stitch by stitch. It's perfect for geometric patterns, custom borders, small motifs, and anything you want complete control over.
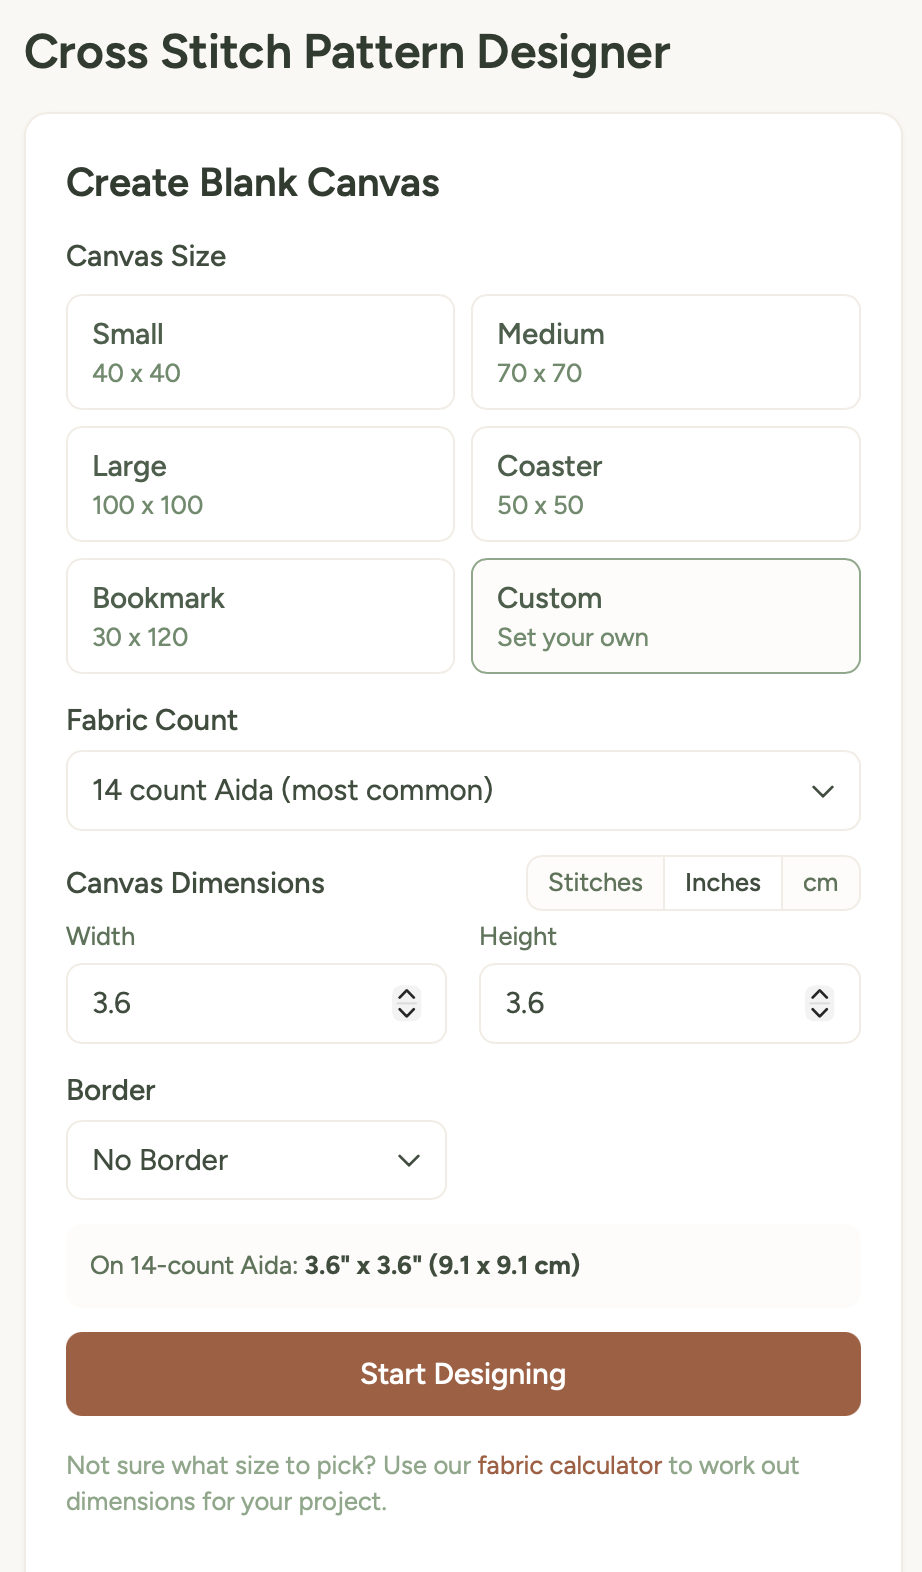
Setting up your canvas
- Go to the Designer page.
- Choose a canvas size from the presets, or enter custom dimensions:
- Small - 40 x 40 stitches
- Medium - 70 x 70 stitches
- Large - 100 x 100 stitches
- Coaster - sized for a standard coaster
- Bookmark - tall and narrow
- Custom - enter any width and height you like
- Choose your fabric count (Aida 11 through 28). This affects the finished size preview - it shows how big your pattern will be in real life on different fabrics.
- You can enter dimensions in stitches, inches, or centimetres using the unit toggle. When you switch units, the values convert automatically based on your fabric count.
- Optionally choose a border style from 13 decorative options - simple lines, hearts, diamonds, zigzags, and a range of circle variants.
- Pick a border colour if you've selected a border. It's matched to a DMC thread colour.
- Click Start Designing to open the editor.
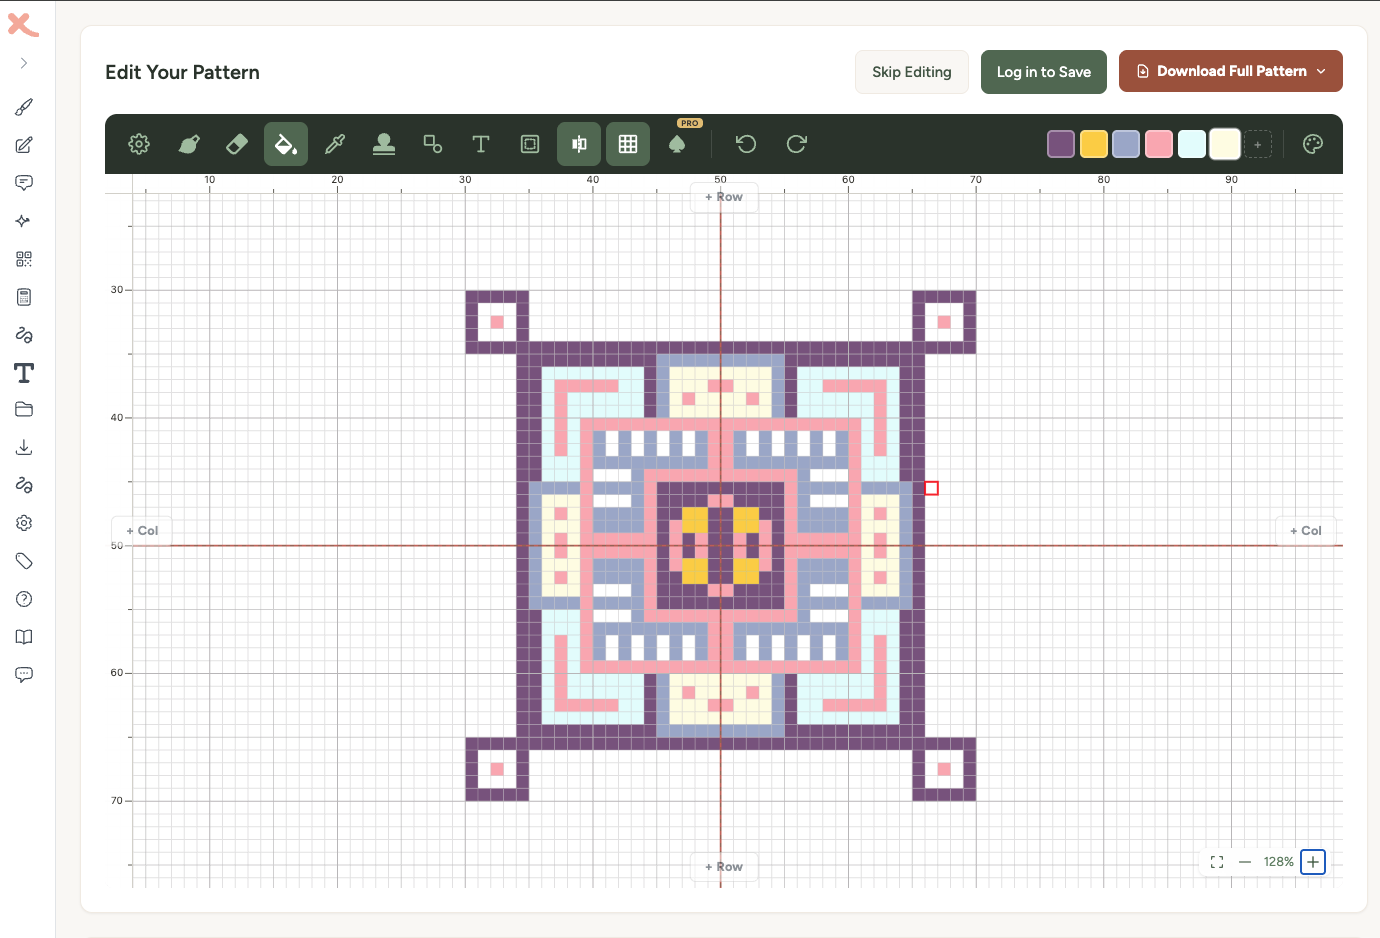
Drawing your design
Once you click Start Designing, you'll open the full pattern editor. This is the same editor used across all of Xstitchify's tools - you get the complete set of drawing tools:
- Brush - draw stitches in your selected colour (adjustable size 1-5)
- Eraser - remove stitches
- Fill - flood-fill an area with colour
- Eyedropper - pick a colour from the canvas
- Shapes - rectangles, circles, diamonds, triangles, and lines
- Stamps - over 200 pixel art icons you can place on the canvas
- Symmetry - mirror your drawing horizontally, vertically, or both
See the Pattern Editor guide for the full details on every tool, touch controls, and keyboard shortcuts.
Colour picker and DMC threads
The colour picker lets you choose from thread colours across multiple brands (DMC, Anchor, Cosmo, and Madeira). You can search by code or colour name. There's also a custom colour tab where you can pick any colour using a hue bar and shade picker - it'll show you the nearest thread colour match.
Your chosen colours appear in the palette bar in the toolbar so you can quickly switch between them as you work.
Symmetry tools
The symmetry tools are incredibly handy for geometric designs. When you enable symmetry, every stitch you place is automatically mirrored:
- Horizontal - mirrors left to right
- Vertical - mirrors top to bottom
- Both (quadrant) - mirrors in all four quadrants
This means you only need to draw one quarter (or one half) of a symmetric design, and the tool fills in the rest. It's a massive time-saver for mandalas, snowflakes, and geometric borders.
Borders
When setting up your canvas, you can choose from 13 border styles that automatically frame your design. These are pre-made cross-stitch border patterns that sit around the edge of your canvas. Borders expand the canvas size to accommodate the frame, and you can remove them later if you change your mind.
Borders are great for bookmarks, coasters, and samplers where you want a polished, finished look without drawing the border yourself.
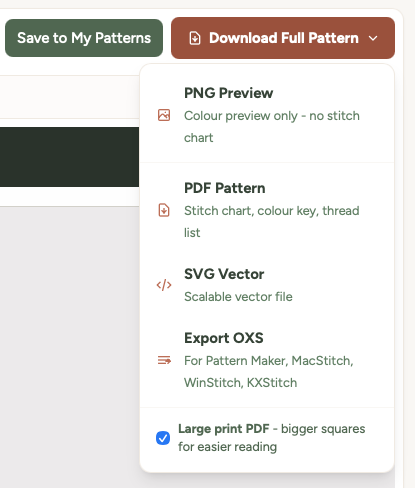
Saving your design
As you work, your design auto-saves so you won't lose progress if you close the browser. When you're ready:
- Save to Library - stores your design in your account so you can come back and keep editing later.
- Download as PDF - gives you a full chart with symbols, grid lines, and a DMC thread key.
- Download as PNG - a pixel-perfect image of your design.
Tips for designing
Start small. Your first design doesn't need to be a 200-stitch masterpiece. Try a 40x40 grid and make a simple motif - a heart, a star, a little house. Get comfortable with the tools first.
Use symmetry for geometric designs. Snowflakes, mandalas, Celtic knots - anything with repeating patterns becomes four times faster with symmetry turned on.
Fewer colours, stronger impact. A two or three colour design often looks more striking than one with ten colours. Constraints breed creativity.
Try the stamps. The stamp tool has over 200 pixel art icons - animals, food, nature, seasonal items, dinosaurs, and more. They're a great way to add detail quickly without drawing every pixel yourself.
Large print PDF for easier reading
If you find the standard pattern chart hard to read while you're stitching - whether that's because of dim lighting, tired eyes, low vision, or just preferring bigger squares - turn on the Large print PDF option before downloading.
You'll find the toggle inside the Download Full Pattern dropdown menu, just below the file format options. Tick it, choose whether you want a colour or black-and-white chart, then click PDF Pattern.
What changes in large-print mode
- Squares are about 5mm wide - roughly twice the area of the standard chart, matching commercial large-print cross stitch publications.
- Grid numbers, page headers, and the thread colour list all scale up so the whole document reads consistently.
- The pattern splits across more pages to keep the squares big - typically 1.5x to 2x as many pages as the standard download.
- The chart style choice still applies - download either colour pages or black-and-white symbol pages.
The downloaded file name starts with large-print- so you can tell it apart from the standard one in your downloads folder.
Tip: Large-print PDFs work well printed on bigger paper too - try A3 if your printer supports it, or take the file to a print shop. Each page is laid out for US Letter / A4 by default but scales cleanly.
Was this guide helpful?
Still need help?
Send us a message and we'll get back to you as soon as we can. You can also reply to any email from Xstitchify.