Counted cross stitch is a form of embroidery where you follow a chart to place X-shaped stitches on fabric, counting threads or holes to position each stitch precisely. Unlike stamped cross stitch (where the design is pre-printed on the fabric), counted cross stitch uses a blank piece of fabric and a separate pattern chart.
How Counted Cross Stitch Works
The process is straightforward:
- You have a chart (pattern) made up of a grid of symbols.
- Each symbol represents one stitch in a specific colour.
- You count the holes or threads on your fabric to place each stitch in the correct position.
- The finished piece reproduces the chart as a stitched image.
Think of it as pixel art with thread – each square on the chart becomes one X on the fabric.
What You Need

- Aida fabric – A gridded fabric with clearly visible holes. 14-count Aida (14 stitches per inch) is the standard for beginners.
- Embroidery floss – Stranded cotton thread, typically DMC or Anchor brand. Patterns specify the exact colours by code number.
- Tapestry needle – A blunt-tipped needle with a large eye, usually size 24 for 14-count Aida.
- Embroidery hoop – Keeps the fabric taut while you stitch.
- Scissors – Small embroidery scissors for trimming thread.
- A pattern – Either purchased, downloaded, or generated with a pattern maker.
How to Make the Basic Cross Stitch

Each stitch is an X made of two diagonal stitches:
- Bring the needle up at the bottom-left of a square.
- Push it down at the top-right (first half of the X).
- Bring it up at the bottom-right.
- Push it down at the top-left (completing the X).
Consistency matters. Always make the top leg of every X go in the same direction (usually bottom-left to top-right on top). This gives a uniform appearance across the finished piece.
How to Follow a Counted Cross Stitch Pattern
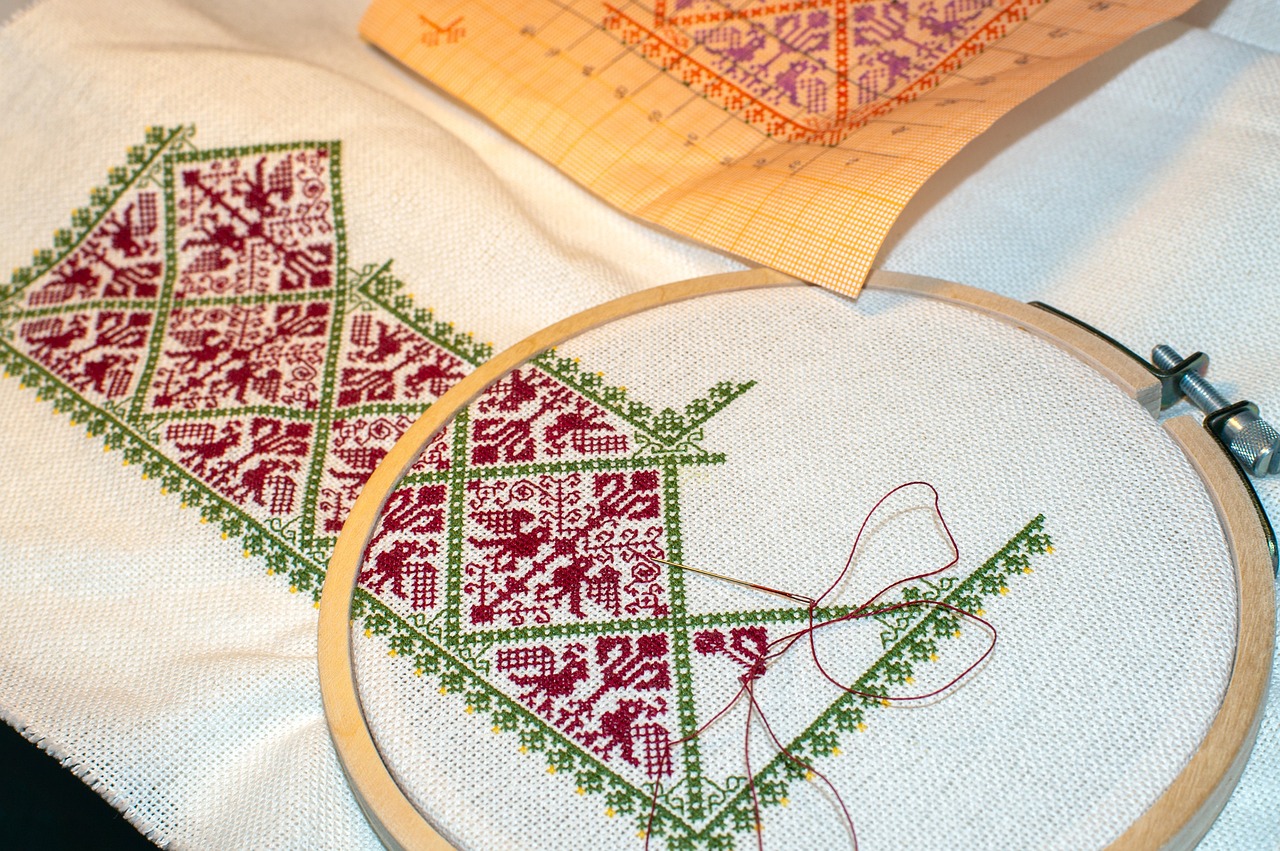
A counted cross stitch chart is a grid where each cell represents one stitch:
- Symbols in each cell indicate the thread colour (e.g., a dot might mean DMC 310 Black, a triangle might mean DMC 321 Red).
- The key/legend beside the chart tells you which symbol matches which colour and thread code.
- Bold grid lines divide the chart into 10x10 sections to help you keep your place.
- Centre arrows at the top and side edges mark the centre of the design.
Where to Start
Most stitchers start from the centre of the chart and work outwards. To find the centre of your fabric, fold it in half both ways and mark the intersection. This ensures the design is centred on the fabric.
Tracking Progress
- Highlight or cross off completed rows on a printed copy of the chart.
- Work one colour at a time across a section, or work section by section – whichever you prefer.
- If you are generating patterns with our pattern maker, the PDF includes a symbol chart with colour key and page grid references.
Counted Cross Stitch vs Stamped Cross Stitch
| Counted | Stamped | |
|---|---|---|
| Design on fabric | No – you count from a chart | Yes – pre-printed on fabric |
| Precision | High – you control every stitch | Lower – following printed marks |
| Design flexibility | Any pattern can be charted | Limited to pre-printed designs |
| Difficulty | Moderate – requires counting | Easier for beginners |
| Customisation | Full – make or generate your own charts | None |
Counted cross stitch is more versatile because any image can be turned into a chart. You can create your own counted cross stitch patterns from photos using a pattern generator, or create text-based patterns with custom fonts and colours.
Common Challenges
- Miscounting. Count twice, stitch once. Use the 10x10 grid lines on the chart and mark corresponding lines on your fabric with a washable pen.
- Thread tangles. Keep thread lengths to about 18 inches (45cm). Longer threads tangle and fray.
- Losing your place. Work systematically. Complete one section or colour before moving to the next.
- Uneven tension. Keep stitches consistent – not too tight (fabric puckers) or too loose (stitches sag). The hoop helps maintain even fabric tension.
Getting Started
The easiest way to start is with a beginner kit that includes fabric, thread, needle, and a simple pattern with clear instructions.
Once you are comfortable with the basics, try generating your own pattern from a photo or creating a text pattern with a name or quote. Our tools produce standard counted cross stitch charts with DMC colour codes, symbol grids, and page references – the same format used by commercial patterns.
Use our fabric calculator to work out how much fabric you need for any stitch count and fabric type.
FAQ
What is counted cross stitch? A form of embroidery where you follow a symbol chart and count stitches on blank fabric to create a design. Each symbol on the chart represents one cross stitch in a specific colour.
Is counted cross stitch hard? The basic technique is simple – it is just X-shaped stitches. The challenge is counting accurately and staying organised with multiple thread colours. Start with a small, low-colour-count pattern.
What is the difference between cross stitch and counted cross stitch? Cross stitch is the general term for the X-shaped stitch technique. Counted cross stitch specifically means working from a chart on blank fabric (as opposed to stamped cross stitch, where the design is pre-printed).
Can I make my own counted cross stitch patterns? Yes. You can upload any photo to our pattern maker to generate a counted cross stitch chart with DMC colours, or use the text generator to create lettering patterns.