A cross stitch pattern is a grid chart where each cell represents one stitch. Symbols in the cells tell you which colour to use. A key (legend) beside the chart maps each symbol to a specific thread colour and code number.
This guide explains how to read and follow any cross stitch chart, whether it is a commercial pattern, a free download, or one generated with our pattern maker.
The Parts of a Cross Stitch Pattern
The Grid

The main chart is a grid of squares. Each square = one cross stitch on your fabric. The grid is divided into sections (usually 10x10) by bold lines. These sections help you count and navigate – they correspond to the same grid you can mark on your fabric.
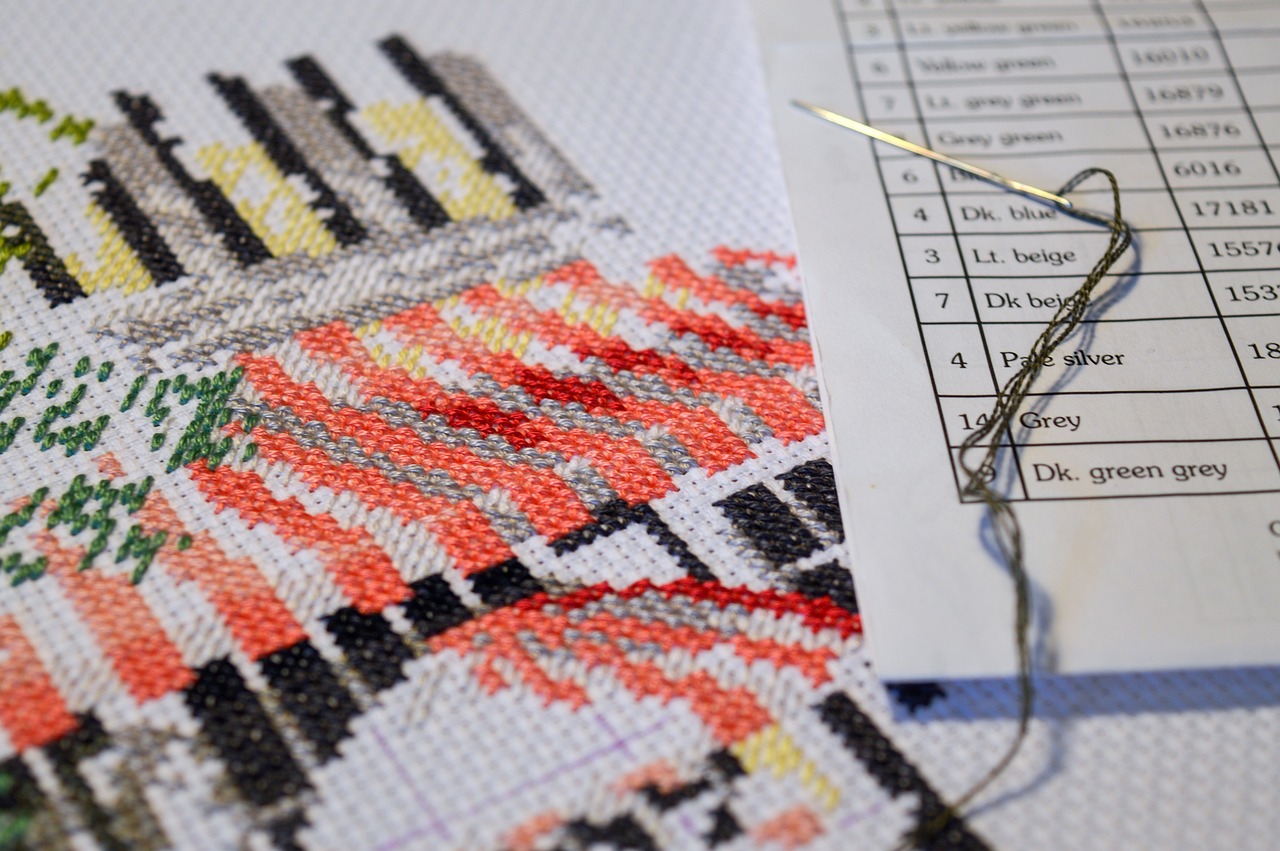
The Colour Key
Every pattern includes a key that lists:
- The symbol used in the chart
- The thread colour code (usually DMC or Anchor brand numbers)
- The colour name (e.g., DMC 310 = Black, DMC 321 = Red)
- The number of strands to use (typically 2 for cross stitch, 1 for backstitch)
Always check the key before starting. Symbols vary between pattern designers – a circle might mean red in one pattern and blue in another.
Browse the full list of thread colours on our DMC colour chart.
Centre Marks
Arrows at the top and side edges of the chart indicate the centre of the design. Use these to align the chart centre with the centre of your fabric, ensuring the design is positioned correctly.
Stitch Count
The pattern should state the total width and height in stitches (e.g., 100 x 150 stitches). This tells you the design size. To calculate the finished size on your fabric, use our fabric calculator.
Types of Stitches in a Pattern
Full Cross Stitch (X)
The standard stitch. Most of the chart will be full cross stitches. Each symbol in a grid cell = one full X.
Half Stitch
Shown as half of an X (a single diagonal line, like /). Covers one square but with only one diagonal instead of two. Used for backgrounds or shading effects.
Quarter and Three-Quarter Stitches
A quarter stitch covers one corner of a grid square. A three-quarter stitch is a half stitch plus a quarter stitch. These are used for curved edges and fine detail, allowing smoother lines than full X stitches can achieve.
Backstitch
Represented by solid or dashed lines running along the edges of grid squares. Backstitch outlines shapes, adds definition, and creates fine details like text, facial features, or borders. It is usually worked after all cross stitches are complete.
Backstitch typically uses 1 strand of floss. The line colour in the chart matches the thread colour specified in the key.
Special Stitches
Some patterns include French knots (small dots), beads, or other embellishments. These are always explained in the pattern instructions with their own symbols.
Colour Charts vs Symbol Charts
Patterns come in two formats:
Colour charts show filled squares in the actual thread colours. They give an immediate visual sense of the finished piece but can be hard to distinguish between similar shades.
Symbol charts (black and white) use distinct symbols for each colour. They are easier to read when a pattern has many similar colours, and they print clearly in black and white.
Many patterns, including those from our pattern maker, provide both formats. Use whichever you find easier to follow.
How to Follow a Pattern: Step by Step

- Read the instructions first. Check the thread list, stitch count, fabric recommendations, and any special techniques.
- Organise your thread. Sort your floss by colour code. Wind them onto bobbins or organiser cards labelled with the DMC number and the chart symbol.
- Find the centre. Fold your fabric in half both ways to find the centre point. Match this to the centre arrows on the chart.
- Start stitching. Work from the centre outwards. Complete cross stitches first, then backstitch and any special stitches.
- Track your progress. Use a highlighter or coloured pencil to mark off completed sections on a printed copy of the chart.
Tips for Reading Complex Patterns
- Work one 10x10 section at a time. Focus on a small area rather than trying to take in the whole chart.
- Stitch one colour at a time across a section to minimise thread changes.
- Use a ruler or magnetic board to keep your place on the chart, reading row by row.
- Print the chart at a larger scale if the symbols are hard to see. Alternatively, view it on a tablet where you can zoom in.
- Check your work regularly by counting back from a known reference point. Catching a miscount early saves hours of unpicking later.
Understanding Pattern PDFs from Xstitchify
Patterns generated with our cross stitch pattern maker or text generator include:
- A colour symbol chart with one page per section, grid referenced
- A colour key listing DMC codes, colour names, and stitch counts per colour
- Pattern summary showing total stitch count, recommended fabric size, and colour count
- A colour preview of the finished design
The PDF format follows industry conventions, so the charts work the same way as any commercial cross stitch pattern.
FAQ
How do I read a cross stitch chart? Each square on the grid represents one stitch. The symbol in each square tells you the thread colour (check the key). Bold grid lines divide the chart into 10x10 sections for easy counting.
What do the symbols mean in a cross stitch pattern? Each symbol corresponds to a thread colour. The meaning is defined in the pattern’s colour key. Symbols are not universal – always check the key for each specific pattern.
Should I start in the middle of a cross stitch pattern? Starting from the centre is recommended. It ensures the design is evenly positioned on the fabric and reduces the chance of running out of fabric on one side.
What is backstitch in a cross stitch pattern? Backstitch is a single-line stitch used for outlines and fine details. It is shown on the chart as solid or dashed lines along the edges of grid squares, worked after all cross stitches are finished.